
In late February of 4821 there was a reported encounter on the remote and rocky moon Marchion within Gaea Prime space. A large Star Army station maintains orbit around Marchion and serves as a launching point for deploying troops to other systems. The dry moon moon has a tolerable atmosphere, but there is little to attract long term colonization. Even base ores and resources prove to be too cost prohibitive to harvest.
Marchion is home to two things, the first of which is an excellent training ground for Star Army maneuvers. The other is that the scattering of populated areas that do exist are far removed from the laws and regulations found closer in the system. If you want to disappear, Marchion may be the best place to go, it's as backwater as it gets.
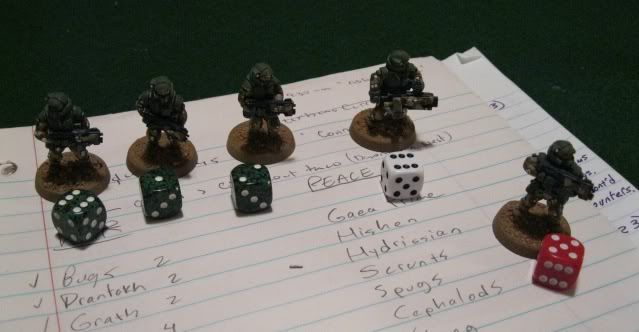
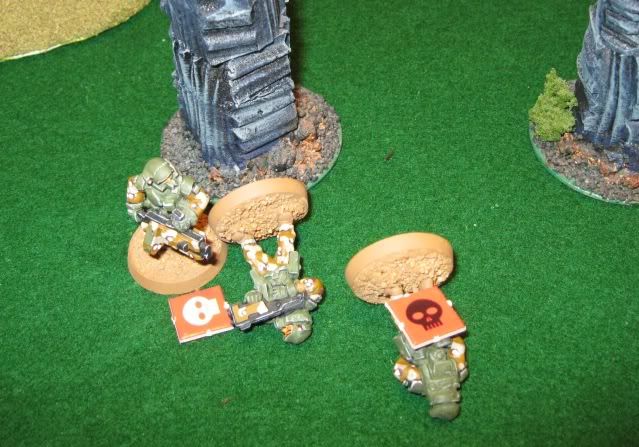
For the Star Army team I rolled randomly for the REP levels. The rep stat helps determine how competent the individual is and more importantly how they react to situations. I got an interesting mix of both high and low, without anything in between. This must mean that a group of experienced soldiers are taking some rookies out for a jaunt around the block, err, moon. All are wearing Hard Body armor, three have laser rifles, the NCO has a laser carbine, and one trooper is equipped with a rapid-fire laser rifle (SAW).
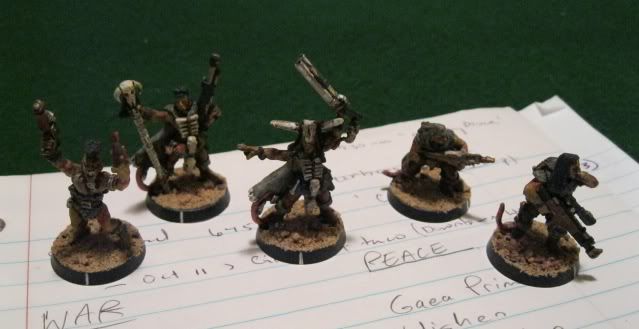
The Nomads are a force out of the scenario book Under a Hishen Sky (which I no longer see available), and represent wastelanders for the most part. I used Basics as their core profile, Basics being stock humans. For the models I went to my Necromunda Ratskins, since they look the part. I equipped them exactly as the figs look, so it's a mix of assault rifles, pistols, shotguns, even a laser rifle. I equipped all but one figure in soft body armor, because their hides and skins look pretty tough. The last guy is basically nude, so no armor for him. As with the Star Army, I rolled randomly for everyone's rep levels here too.
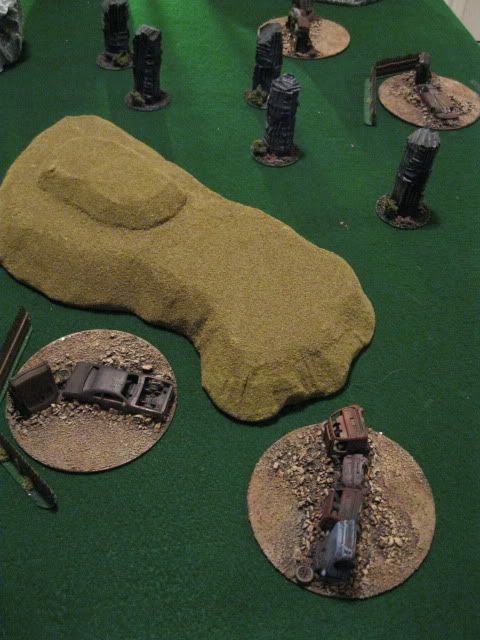
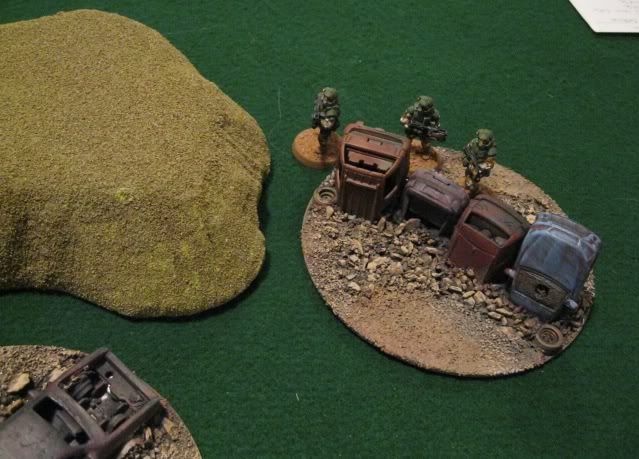
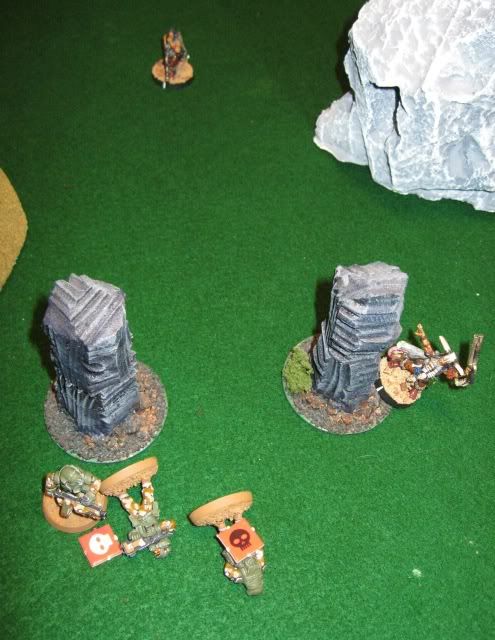
My junkyard cars are for 15mm games, but I put them on here anyway to just kind of abstractly represent this arid, junked and abandoned moon. Even though the scale is way off, during the battle they just kind of blend in and you don't really notice. I gotta say, this is the one time I wish I had a terrain mat, a desert one would've been perfect!
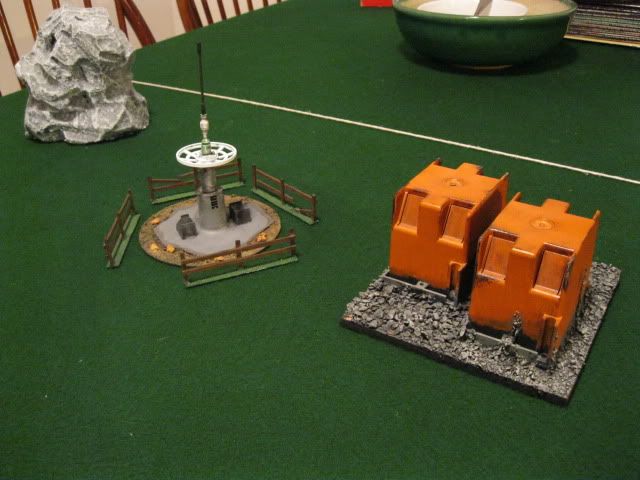
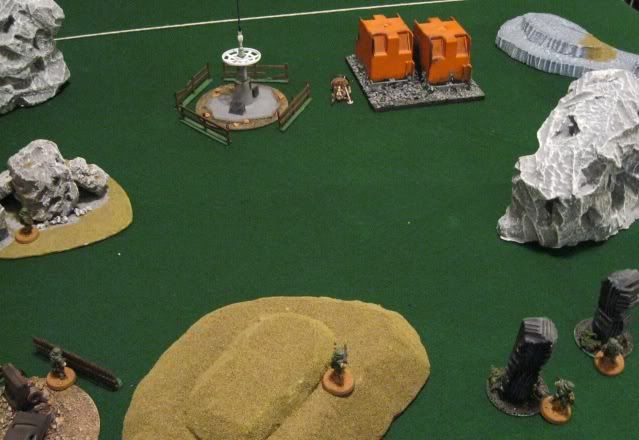
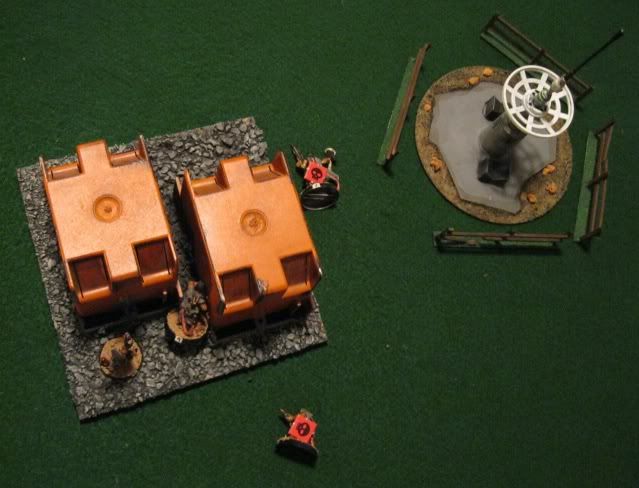
There's a sat-comm tower here as a type of backwater, remote signaling station. Next to the array is a pair of Boutron-class generators, providing plenty of juice to the station to run autonomously for decades at a time. There's also a pretty crude fence around the dish, just to let chance wandering locals know they need to stay clear of it.
Below are pics I took during the battle as well as my notes. I broke down the notes I took during the game by turns, so I'll list these as bullet points. Had I thought about it, I would've typed these up as I went along instead of having to transcribe them now!
To pick the scenario I used the military encounters table and rolled up 'Raid'. The Star Army's objective is to get the enemy Nomads to surrender, if nothing else at least capture one or more of them and drive the rest off. The Nomads don't have a goal, they're just hanging out and don't even know the Star Army has detected them.
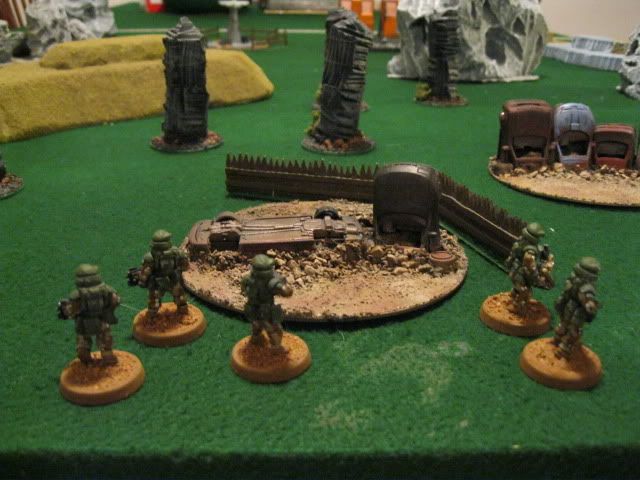
- Star Army enters area and splits into two teams trying to surround the unsuspecting Nomads.
- One trooper and the SAW gunner split right while the NCO takes the others troopers left.
- Starting table edge was rolled for randomly.
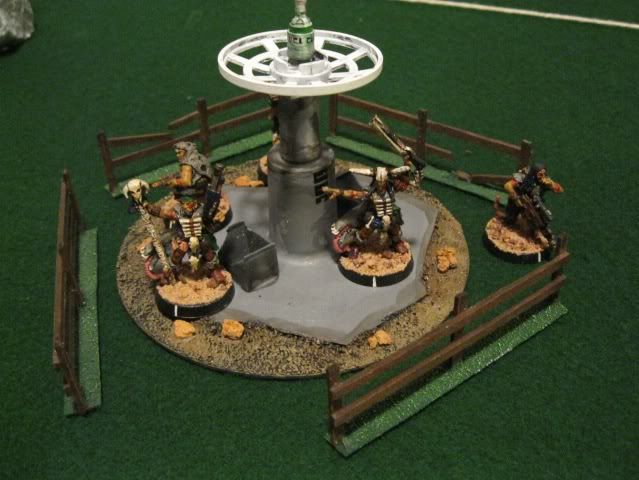
- I give the Nomads d6 turns to hang out around the sat-comm array before they get bored and move on the generators.
- I roll a '1', so they get bored pretty quickly!
- This means the Star Army isn't in ideal position before the Nomads are on the move, and that means the Star Army might get spotted.
- So far lines of sight are obscured by terrain and the Star Army is being pretty stealthy.
- The NCO leaves his two troopers at the barricade as he circles back, the Nomads moving early on changed the original plan.
- Leaving the SAW gunner on his own, the other trooper is ordered to join the NCO.
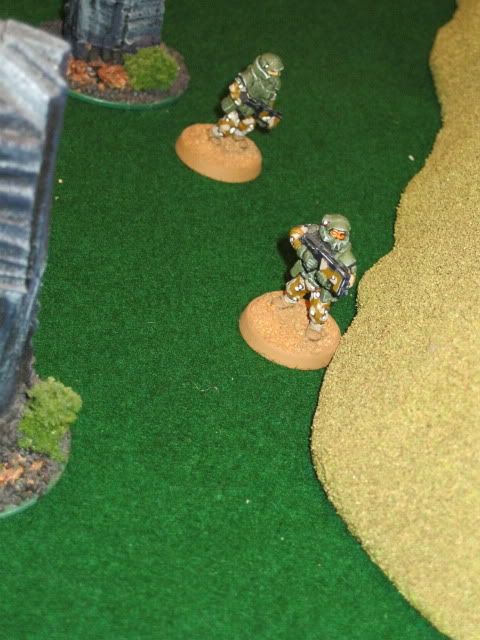
- They hug close to a hill for cover while moving up the middle.
- Two troopers are on the far left, crawling towards cover
- The SAW gunner holds the right flank behind the cover of debris.
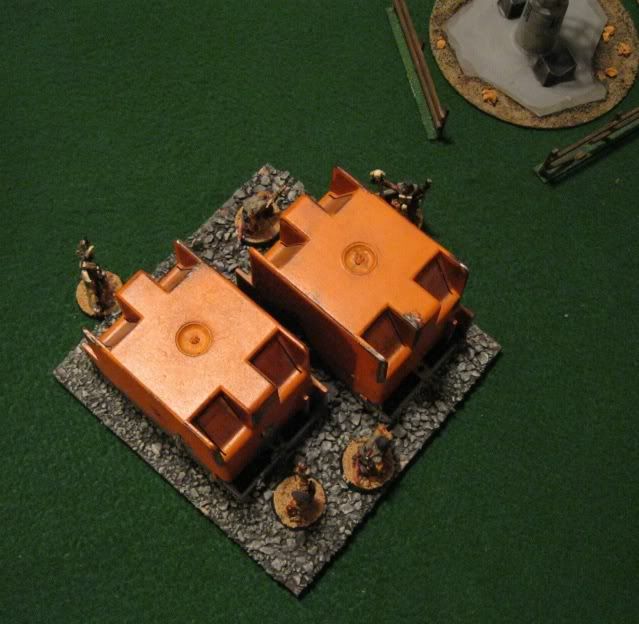
- Nomads have now moved to the generators and begin milling about there.
- I had to keep an eye out for their facing, which could trigger in-sight checks on the Star Army, who still weren't quite in position.
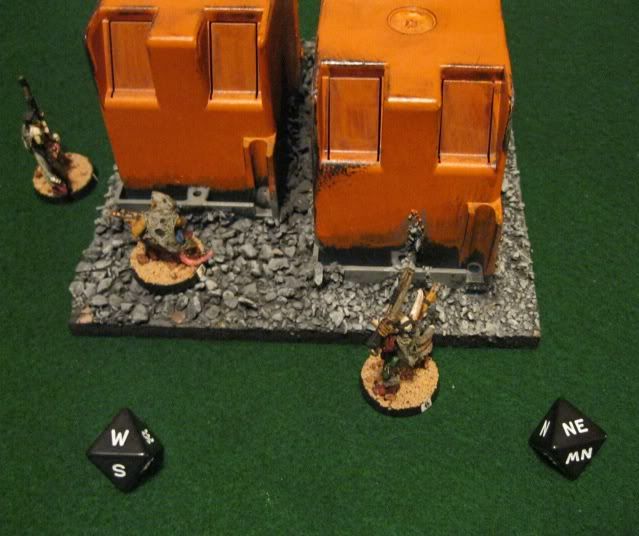
- To randomly determine facing at the end of the Nomad's movement I was able to use my new 'cardinal direction' dice. A wrong roll here meant the Star Army would be seen.
- The Nomad leader, Chief Anikando, comes around the generator and makes an in-sight check on the Star Army NCO, passing it.
- He opens fire with his shotgun, but is too far away to be effective, still the Star Army NCO is forced to duck back since his laser carbine is technically 'outgunned' by the shotgun.
- As the NCO falls back, the next Star Army trooper becomes visible, so Anikando makes another in-sight check and passes it as well.
- Again he opens fire and again comes up short, but the booming report of the shotgun causes the trooper who was in the open to go to ground, prone.
- On the Star Army's next activation they move into position to advance upon the Nomads.
- One trooper on the far left flank hits a Nomad in cover from 20" out with his laser rifle, killing him instantly, drawing first blood.
- The rest of the troopers carefully use cover as they slowly tighten the noose and advance.
- The Star Army NCO calls out for the Nomad surrender but gets no response, things look to be going very well for the Star Army.

- The Nomad named Plantain has somehow acquired a scope for his assault rifle and has wedged himself between the hard cover of both generators, giving him an excellent sniping position.
- As the Star Army SAW gunner moves from one piece of cover to the next, he comes across Plantain's field of fire, and is nailed by the sniper, going down severely wounded and out of the fight.
- Another Nomad rounds the far side of the generator (the spot where the last Nomad was killed) and is immediately sighted-in by a Star Army trooper waiting in cover.
- The Star Army trooper fires at the Nomad, but misses.
- The Nomad passes his 'received fire' check, and snaps off a return shot with his assault rifle killing the Star Army trooper dead before the body even hits the ground.

- The NCO scrambles to the top of the hill and guns down the Nomad with his laser carbine.
- Next he orders the trooper in cover at the base of the hill to go to the wounded SAW gunner and retrieve the SAW.
- As this trooper does, the same Nomad with the scoped assault rifle, Plantain, takes him out with a head shot, killing him instantly.
- The Star Army NCO is now looking at three of his troopers down, two of which have flat-lined on his squad monitor.
- The NCO calls for the all-retreat to the remaining trooper.
- Two Nomads have been gunned down and killed, but three still remain.
- The Nomad leader has snuck around the left flank, hoping to come up behind the remaining troopers, or at least maneuver to a good crossfire position.
- The Nomad sniper named Plantain continues to do very well.
- The near-naked Nomad with the two pistols hasn't had an activation since the beginning of the game when he moved to the generators.

- Not wanting to leave anything behind for the Nomads to use, the NCO orders the last trooper to stop by his fallen comrade and remove the rifle and comm-gear.
- The NCO skids down the hill to do the same with the other dead trooper and hopes to drag the wounded SAW gunner to safety.

- Seeing an open target, Plantain moves from cover and around the generator.
- He zeroes in on the trooper grabbing equipment.
- The trooper is unable to make an in-sight check on Plantain because his back is turned to him.
- Plantain is once again successful as he hits the Star Army trooper no fewer than three times (I rolled two sixes and a five!) knocking the trooper to the ground, wounding him and putting him out of the fight.
- The NCO gets to the fallen SAW gunner, shoulders his own laser carbine and hoists the much larger weapon, he then gets ready to haul the wounded gunner to safety.
- I make an impromptu 'rep-check' for the NCO to see if he'll stick to his training and get off the board to go get reinforcements or if he'll stubbornly stay and fight to avenge his fallen troops, even if it means suicide.
- Meanwhile, the Nomad leader and Plantain both advance on the NCO's position.
- The NCO passes his rep check, he knows he has to get out of there.
- With two enemies bearing down on him, the NCO also knows he'll have to leave the wounded gunner behind.
- The Nomad leader steps from cover to blast the NCO, but the NCO makes his in-sight check and instead blasts the Nomad leader at point-blank range with the SAW.
- The Nomad leader's soft body armor is shredded, but it did its job as he is knocked to the ground unharmed.
- Keeping cover between himself and the sniper, the NCO makes a hasty retreat from the field, ending the conflict.

The battle is over and the Nomads mourn the loss of two of their own. They give them proper burials (after their gear has been removed of course). Their ranks are bolstered by many more Nomads across the wastes, however this victory was still costly.

Two wounded Star Army troopers make for some very nice negotiating power, but in reality I suspect these poor fellows are about to become dinner. The other two fallen troopers will be stripped of anything usable and dumped unceremoniously in a shallow grave. Although the NCO did make off with the SAW, the Nomads still picked up an impressive four suits of (slightly used) Hard Body armor as well as three laser rifles. Not only that, but they also have the comm-gear off the troopers which they can use to monitor communications of any future Star Army transmissions that make it down to the planet.
For the following turn within the campaign season I stacked the deck pretty high for another encounter hoping for some Star Army payback. Dice being dice however it didn't work out to the Star Army's favor and the encounter never transpired. I chalk this up to the Nomads being able to cover their tracks too well.
With a military installation in orbit, and a slaughtered squad on the ground, you can better believe there will be follow-up action. You can also bet it is not going to go well for the Nomads. At all. That however is a tale for another time and the galaxy is way too big to dwell on it, we have other battles to be fought elsewhere!
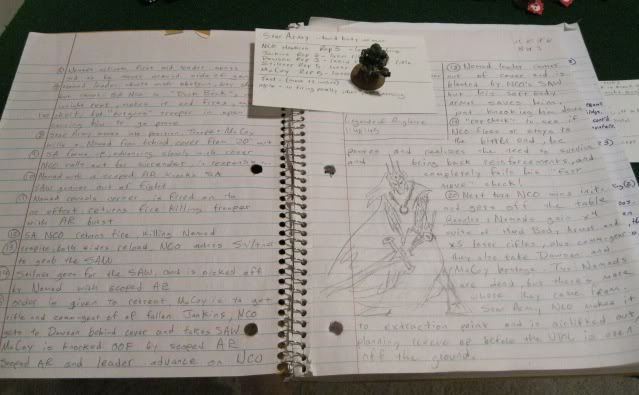
Here are the notes and bullet points I took during the battle. I must say, the reaction system never fails to impress me. This battle was supposed to be a cakewalk for the Star Army, but as you can see, it was as far from that as possible. It certainly made for a good story though, and a fun game, and those are the two things I was looking for!
Damn that's an in-depth battle report. Only had time for the first bit, will have to come back. This is still that you vs. yourself rules, correct?
ReplyDeleteWOW what an awesome battle report!
ReplyDelete@Tristan: Thanks! Get back to it, it has quite the surprise ending! I've talked about two solo rules lately, the ones for this battle (and subsequent battles in this 'universe') are with Two Hour Wargames' 5150. A
ReplyDeleteAnother set of sci-fi solo rules to check out is Gut Check! which I've talked about here on the site.
@Meatball: Thanks chief!
Looking good Gyro! Definitely an interesting battle report and I can't wait to see what happens in the follow up.
ReplyDeleteReally think I'm going to have to look into picking up 5150 so I can give it a try myself. Got a ton of old SST minis sitting around just waiting for me to do something with them. I also noticed that the "Under a Hishen Sky" book is now part of the Infestation book. As far as rules, did you mainly use the stuff from the core rules or did you also take more from the "Hishen Sky" book than just the Nomads force?
All I used out of Hishen Sky was the Nomads entry and their reference sheet. Everything else came from the core book.
ReplyDeleteNice find on the Hishen book, I didn't see it anywhere.
I'm going to look this up it sounds really fun.
ReplyDeleteGreat AAR Gyro!
ReplyDeleteThat was an awesome battle report, wow it was intense! I really like the system you used for determining if the Star Army guys could be seen as they made their approach, those cardinal direction dice are great! That made for a fantastic story, thanks for the write up.
ReplyDelete@Deadmeat: It was fun, solo gaming is something I don't do a whole lot, but it was worthwhile.
ReplyDelete@Kobayachimaru: Thanks!
@Padre JJ: The cardinal direction dice worked out great indeed. I will be using those again and again. The overall story came out not too shabby, it gives me hope for my campaign's future.
Awesome. Love the way you involved the ratskins!
ReplyDeleteThanks! I love my Renegades but if we're in a Necromunda drought, they don't get much attention, I saw this as a perfect remedy to that!
Delete