Showing posts with label terrain. Show all posts

Tuesday, September 6, 2016

Armies on Parade: Dwarf Fortress!

Every year Games Workshop holds their Armies on Parade event across the globe.  It's a great chance to show up with your army and get a little display in.  Most of the time I gawk at all the entries that aren't my own, and this one is no exception...the Dwarf Fortress!

The big difference now is that I am a GW store, and this sucker I got to see in person.  The cool thing about it is that for one, it adheres to the two-foot square rule, and secondly, it was really only about half done.  Since these were taken, more work has commenced on it, and this year it promises to really be something special.

So the Dwarves (dwarfs!) march out the main doors, but what you don't see is that a tower above the entryway holds all of your dice.  Once you pull the lever all the dice tumble down through the tower and roll out the 'mouth' onto the walkway.  Instant dice tower, and if I may venture, one of the nicest dice towers this world has ever seen.  As always stalwart students, enjoy!

Saturday, August 20, 2016

Hot! Hot Lava!

One of the incredibly sweet benefits of my new job is getting to play on some top notch terrain from time to time.  In this case a couple of molten lava Citadel Realm of Battle boards!  Thought I'd share the love here, get it while it's hot!  That's the last one, I swear.

Friday, January 17, 2014

Friday Rucht Hour: The Alchemist's Tower

Ask and ye ask receive…

Earlier one of our posters asked for some posts on terrain and building terrain. Well, here we go. What we have on deck is the Alchemist's Tower! It's meant to be a piece of terrain for Warmachine, but it could serve any purpose, really. Can't take credit for this one. The credit goes entirely to Nick, whose gaming table we saw recently. 


First off, the bottom of the building is made from hirst arts bricks. The house, of course, can be detached from the tower itself. The house is made up of a variety of materials. The windows are simple Kobblestone miniatures decor, glued onto the walls, which are foam. The planks of wood you see here are strips of balsa, each one lovingly placed to resemble pieces of timber. Check out that door! He could have ordered a door, but nope…he just built one out of balsa. 


The roof tiles are strips of plastic. Instead of cutting and placing each tile on the roof individually, he cut  long strips of plastic and then sliced them along the edges, to give it that uneven, late-medieval look. So, each row of tiles you see is really just one long strip of plastic. Even up close, though, it's hard to tell. It looked to me like he had placed each roof tile down individually. On the roof there, you can see a bit from a Cygnar model to serve as the tower's steampunk weathervane. 


The round tower pieces below are hirst bricks, of course. They are arranged so that they resemble a staircase that goes up into the main house itself. No expense was spared on the details here! You could stage a heroic swashbuckling fight on the spiral staircase if you wanted!


Since it's supposed to evoke a Warmachine vibe, to give it that steampunk feel, Nick embedded some brewery scenery into the house itself. Rather clever and only really possible when you build your house brick by brick like Nick did.  


All for now. Let us know if you want to see more terrain techniques! 


Friday, November 30, 2012

Friday Rucht Hour: Dwarven Forge!

So, last post I talked about Dwarven Forge stuff briefly. Here, I just wanted to talk about their latest set. And how I want it soooo badly! Behold the Ruins!


The set that they've advertised lately is their Ruins Set, which I find tremendously cool. You can use traditional Dwarven Forge as terrain, of course, but on a battlefield, it feels a bit blocky. The ruins set, however, fixes that by allowing you to add crumbling walls and corners to suggest fallen down structures. For me, this is the set that I've been waiting for. It's just that I don't have the money for it right now.

So, that's me. My plug, my post, hopefully my future Christmas gift!


Friday, November 23, 2012

Friday Rucht Hour: Happy Thanksgaming!

Hey all! Sleeping that tryptophan off yet?

Let's talk terrain. I wanted to get your guy's perspective and see what you all use for terrain on your own tables. Nick has done a tremendous job with his home terrain, using a great deal of Hirst Bricks (seen below). One of the best pieces of terrain that he has, though, is his self-made rubber mat. Crumbled bits were applied to the mat and then an air brush was used to give it splotchy coloring. The result is that your turf on your table looks fantastic.


Speaking for myself, I'm much more low-tech. Simple green felt to suggest grass is what I use. However, I definitely have bought plenty of train terrain over the years to enhance my table. Below, you can see some of my train kit trees. 


There's also the good old Dwarven Forge tiles. While mainly meant for dungeon crawling, the Forge tiles also double great as terrain. Here, not only do they make some terrain, but they demarcate a control zone for the scenario's objective. 


Finally, one thing we use from time to time are paper cutouts. A number of companies make these. You can see some of mine to the right of the picture. Bonus points if you know where that building came from. Hint - it's seriously old school. 


So, I want to hear from you guys. What do you use for terrain? Paper? Plastic? Only hand-crafted? Just construction paper cut-outs? What do you use for turf? Are there any rules (unspoken or otherwise) at your table for terrain? For example, you may dislike anything you didn't craft. Or anything made from paper. Etc. What do you do at your table? Let us know! 

Friday, August 17, 2012

Friday Rucht Hour: Challenge Accepted

Not long ago (about half an hour ago, actually) I just read Mik's throwing down of the gauntlet. So, here's my taking up of it. Friday Rucht Hour on Friday.

In my earlier post, I showed off some minis and gave a quick and dirty battle report. However, now I'd like to take some time to just showcase the Lair of the Astromancer. We saw it a little bit in the after action report, but I'd like to do a more proper review of it here.

Overall, I was pretty pleased with this product. It is quite pricey, weighing in at 80 dollar and change. Also, it is a Games Workshop product, and there are people who are opposed to buying their products.

The model itself is mainly two large pieces which you glue together. Now, Caveat Emptor, the two pieces of this terrain model did not match up perfectly evenly. More on that below. The top of the tiled roof is in two pieces. The observatory and the tower on which is rests much be assembled as well. If you wish, you can leave the observatory dome off and put on a parapet. Or, like myself, assemble both and switch them out as needed. I haven't assembled the parapet yet.


Pros: 
  • The model is basically one very large piece which is quite solid. You can transport it easily by just picking it up with one hand. It won't fall apart on you.
  • The terrain piece is fully three-dimensional and meant to be appreciated that way. What I mean by that is there is no "front" to the terrain. As you can see from the pics above, you could place it with the walk way out front or the skull stone out front. It truly is meant to be appreciated from all sides.
Cons:
  • It's 83+ dollars. 
  • Here's my biggest problem with it. The hard plastic material that it's made from. The plastic mold that came in the box did not match up, leaving a gap in the mountain. I'll have to fill it in with putty. What's more - putting the plastic in boiling water did not seem to make the model bend so that I could get both pieces flush. After all is said and done, I was okay with it, because it's a problem that can be remedied. However, it's definitely a problem some would find egregious. 


Sunday, May 27, 2012

Sunday Day Rucht Hour: And Now the Warmachines!

Sorry that I didn't post on Friday - life hit me in the face.

In any event, I thought I might continue to contribute to the minis portion of this game. If you remember my last Warmachine post, my buddy Nick created two terrain hills which could also support a bridge that connected them. We played a scenario game recently which incorporated the bridge.

The bridge was made with Hirst bricks and what Nick did was to stagger the bricks on each end of the bridge so that it locks in place on each hill. It makes for a nice and sturdy piece of terrain.

My opposition takes position on a hill overlooking my forces.

And here's my forces - a small unit of Searforge Dwarves

We did a scenario in a round-robin style tournament. In scenarios, Searforge really shines. Few people usually play Searforge, but I will be taking them out a lot if we keep doing them. For one, the Searforge advantage is that your whole army gets 4" added to their deployment zone. For those not familiar with Warmachine, it means that you get to be 4" up the field, closer to your opponent and objectives.

For another, Gorten's Feat allows him to move his opponent's army up to 8". So, I can push people off of objectives. Finally, my list included Gudrun the Wanderer, who was absolutely the MVP in this game.

Here's a shot over the shoulder of a mini, looking down at my army. Not a bad scenic shot.

A shot over the edge of the bridge, down onto the Khadorian forces below.

A shot from my army's perspective, looking under the bridge at the approaching forces. In the shadow of the bridge is one of the scenario's objectives.

So, the scenario required you to place medium-to-large based models next to objective or a bunch of your smaller soldiers. At the bottom of the second turn, you got points for objectives you had models next to.

I started the game out within a move of one of the scenario's objectives, with my small force bunched up to one side of the table. Because of that, my opponent scrambled across the field to try to engage me. He also made a fatal mistake, he changed course, which meant that one of his units didn't do too much for one turn.

The reason that Gudrun the Wander was the MVP was the fact that he could run to an objective and then knock himself over, making himself immune to ranged attacks. Not only that, he has an ability which makes him heal to full once you kill him. This meant that once he fell over next to an objective, you had to run over to him and kill him twice to get him off. You couldn't just shoot him off.

The game wrapped up pretty quickly thanks to my MVP and the fact that my whole army started pretty close to one of the objectives.

Saturday, February 26, 2011

Star Station Zero Sci-Fi Tiles

Recently I came into possession of these great spaceship tiles on DrivethruRPG. For just five bucks you get an awesome set of some really nice looking tiles, suitable for pretty much any of your "Hey, I'm on a spaceship!" needs.

What's more is that each tile has different artwork, and since you've got the PDF, you can print fifty of them if need be and layout an entire space station.

Here's what you get:
  • Four 5x5 square floors
  • Four 3x5 oblong floors
  • Six 3x3 square floors
  • Two 5x1 oblong floors
  • Open and Closed Doors (in two sizes)
  • Open and Closed Blast Doors (also in two sizes)
  • Room Connectors
  • Custom wall cubes

I really like the ways the doors work as well. They fold in a way that if you're using somewhat rigid cardstock they become quite sturdy. Also, when a door is 'closed' there are little red lights on the deck floor at its base. When the door is 'open', you can see a slot recessed in the floor and green lights on the deck, pretty clever. Also the doors come in two sizes, 10mm ones to fit within the black edge borders of each room tile, and 20mm which straddle the edges but are more stable. Making Star Trek 'door-swishing' sounds is optional.


I didn't want to show all the tiles here, but there's a great preview on the product page here. The attention to detail is really worked into each tile, and little things like the ambient lighting and scuff marks for wear and tear round them out. There's a great room with a large airlock hatch in the center of it too that could come in handy for a number of things. I'd even go as far to cut a square of black, speckle it with stars, and use it as a vacuum to go in the center of the tile. You don't want to open those doors!

The tile grids are laid out in 20mm squares, and these work best obviously with 15mm single-based figures (or classic 25mm figs). Given the huge (and economical!) numbers available of sci-fi 15mm selection out there nowadays, it would seem Star Station Zero made a timely appearance in our quadrant.

Tuesday, January 18, 2011

Tantive IV Battle Map


In addition to the Hordes poster I'm giving away, look what else I found while cleaning out the downstairs closet this last weekend! This thing is absolutely massive, I've forgotten just how cool it really is (and no, it's not up for grabs, sorry). The digital file is long gone, this is all that's left so I think I can truly say it's a one of a kind.

For scale, my game table is eight feet long, so this map of Star Wars' iconic Corellian Corvette is, I'm guessing, ten feet long? Way back when, way way back in another lifetime I used to work at a retail office copy shop. A gaming buddy (who also worked there) and I used to make all kinds of these maps to be used with all kinds of miniatures and games. The bulk of them were for Heroclix, and we had some great battle maps; graveyards, subway stations, a Skrull spaceship, but those haven't turned up and I doubt they will now.

This map was the last one we made, we made it big...almost too big!

The command deck, each square equals one inch

Main corridor with escape pods

Aft corridor

Engineering

25mm figs checking out the accommodations

15mm figs hanging out near the engine core

28mm figs traversing a long corridor

Now that this map has resurfaced I just have to get some use out of it! As you see from the comparison shots, the scale will be right on for pretty much whatever we do. It would be fun to try some Space Hulk on a true hulk of course, but any kind of boarding action will do. I remember there being some star-ship rules in AE Bounty as well. Whatever we decide to do with it, you're sure to see more. I may have to get another table to add to the end of the regular one just to accommodate everything. Enjoy!

Saturday, January 15, 2011

Gut Check v1.3


All dressed up and nowhere to go! I waffled quite a bit on my "more sci-fi gaming in 15mm" vows last year, so I'm trying to rectify that this year. To start off with are the very-in-development rules called Gut Check!, emphasis on the exclamation!

I started following Spacejacker's blog, Tiny Solitary Soldiers because of his excellently painted 15mm troopers (still waiting on that basing tutorial). Then he started adding in some re-purposed Heroscape terrain as terrain, again excellently done.

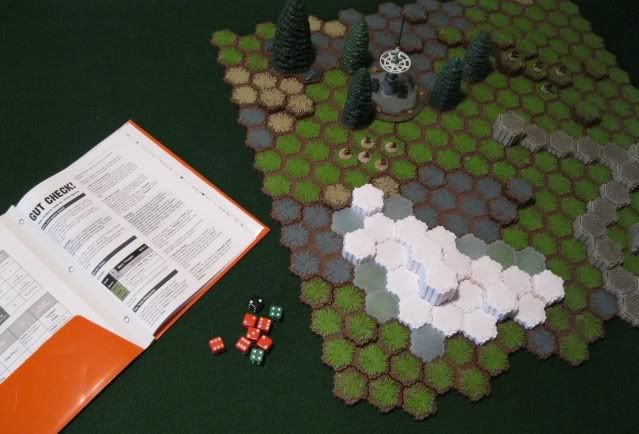
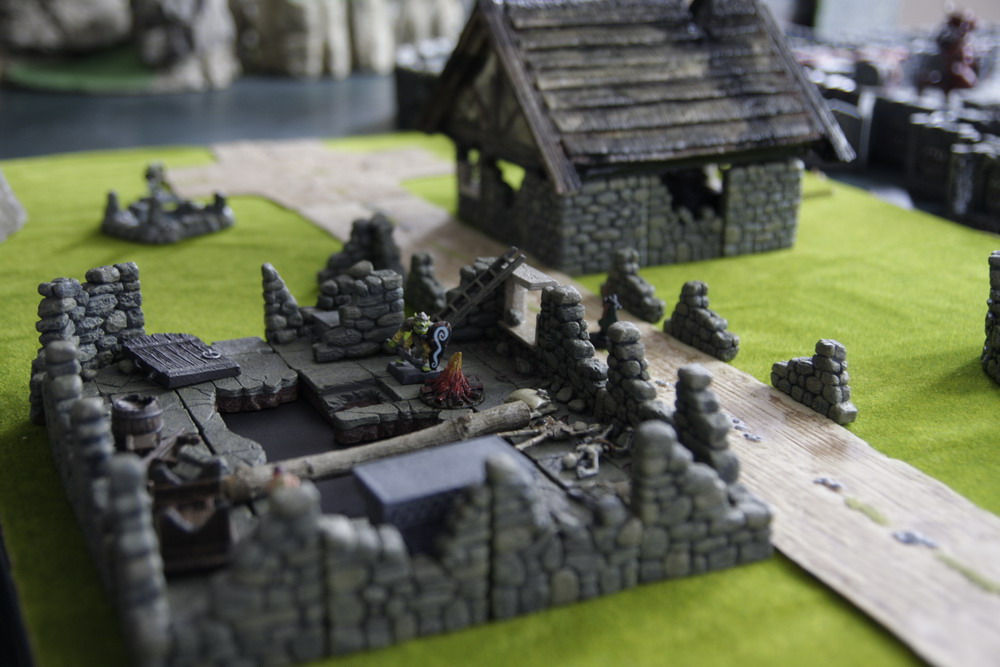
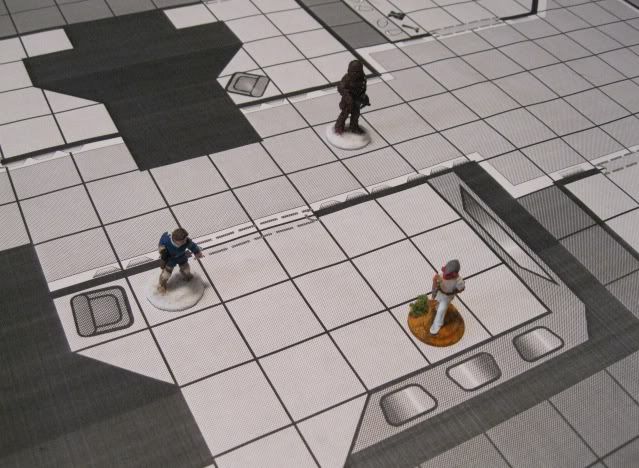
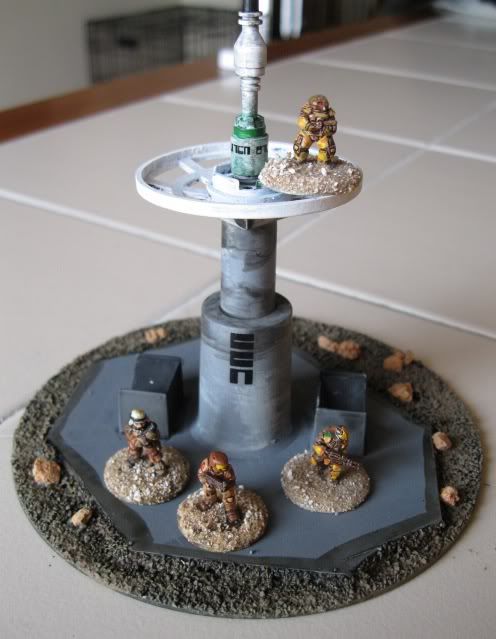
Putting it all together Gut Check! was born, his home-brewed solo skirmish rules specifically for 15mm sci-fi. Which of course sounded right down my alley. I opened with, "all dressed up and nowhere to go" because as you can see from the top pic, I was SO close to trying out the rules! We've got a large RPG session inbound tonight so I had to clean off the table, all of it. Gut Check! was shelved...for now, but I snapped some pics anyway.


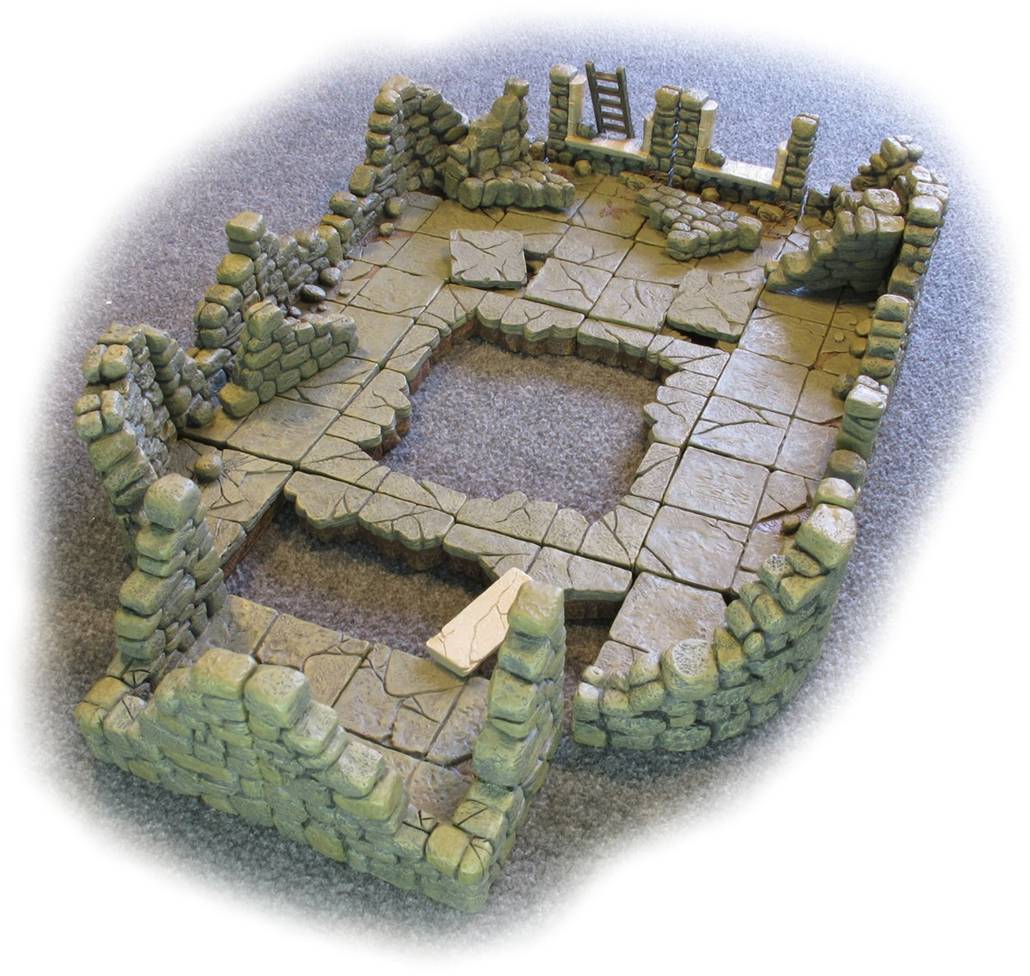
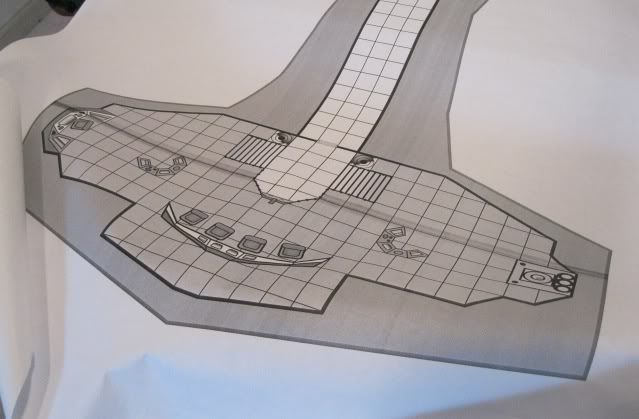
Gut Check! is a hex-based game, and you can easily use a dry-erase hex map or even oversized hex paper copied off at an office copy store. For me, I went with 
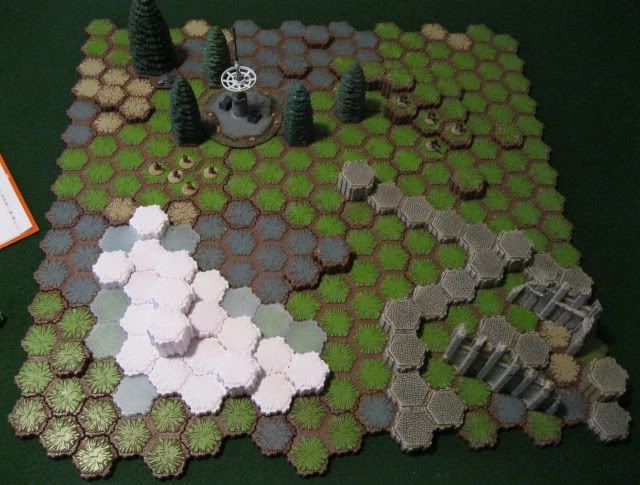
Heroscape tiles, very recently reclaimed I might add. These work great because, obviously, they're three dimensional (and come already painted if you don't have the time for a repaint). The above battlefield is about twice as big as recommended for an intro game, but I was wanting to put all of my tiles out there and see just how much I had and what I could do exactly. I was pleasantly surprised to be able to make it roughly square to boot.
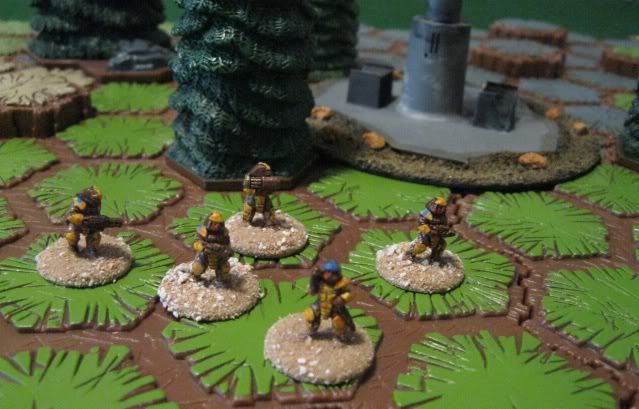
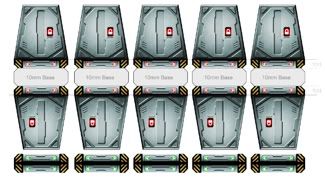
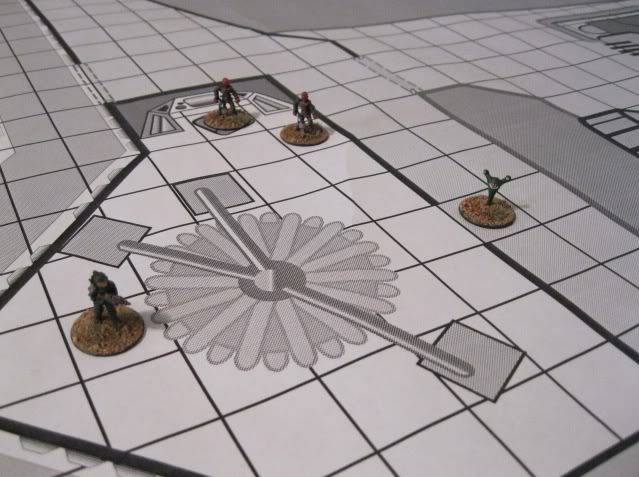
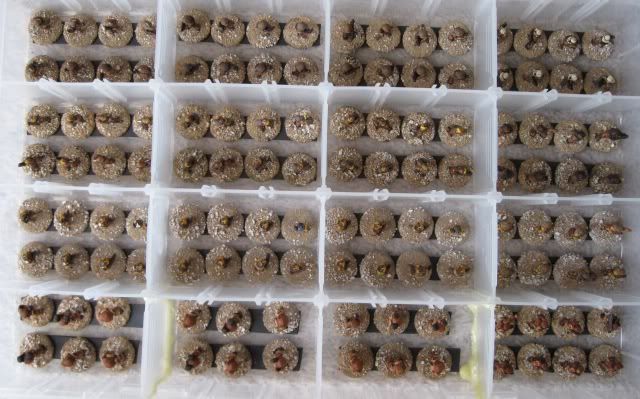
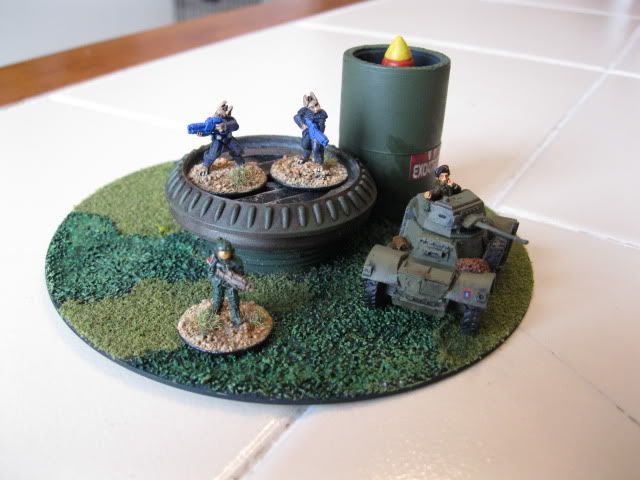

ConFed Troopers (GZG Japanese Corporate) were to one of my squads. There's no points cost in Gut Check!, just statting your models with a 'common sense' method. Same thing goes for the weapons, of whihc a short sample list is already given.
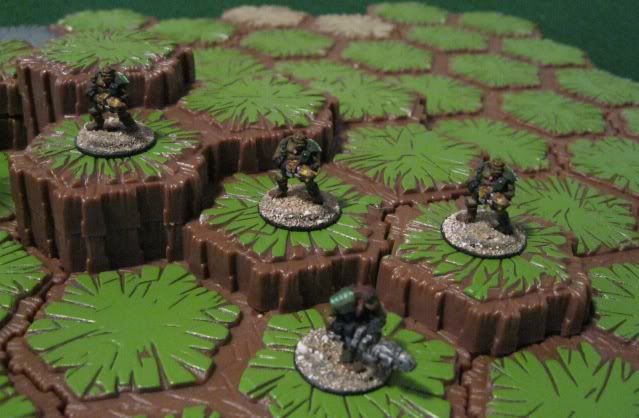
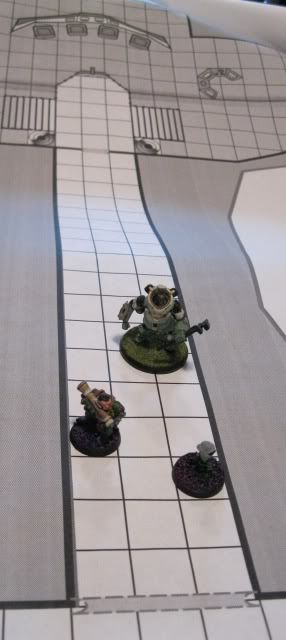
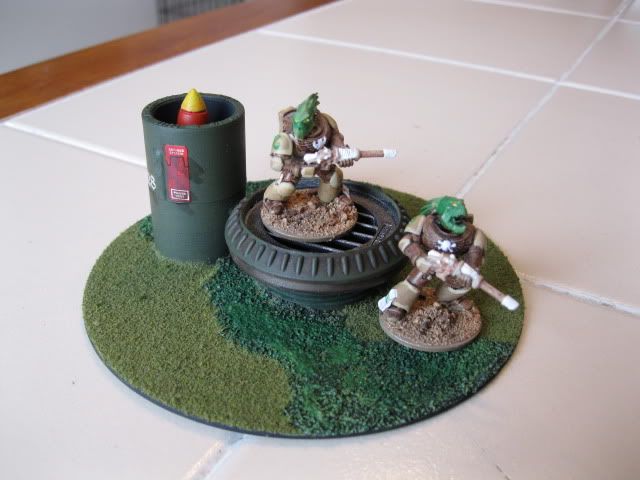

My Mangalore Mercs, also from GZG, are fewer in number, but tout better toughness and deadlier guns (though shorter in range). I've got some more of these unpainted I should whip up, these are great looking figs.


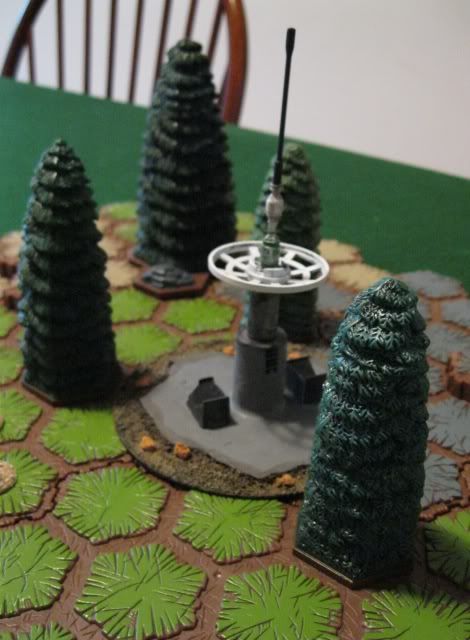
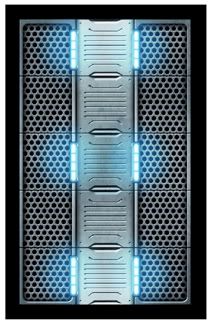
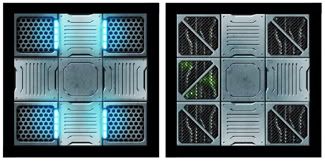
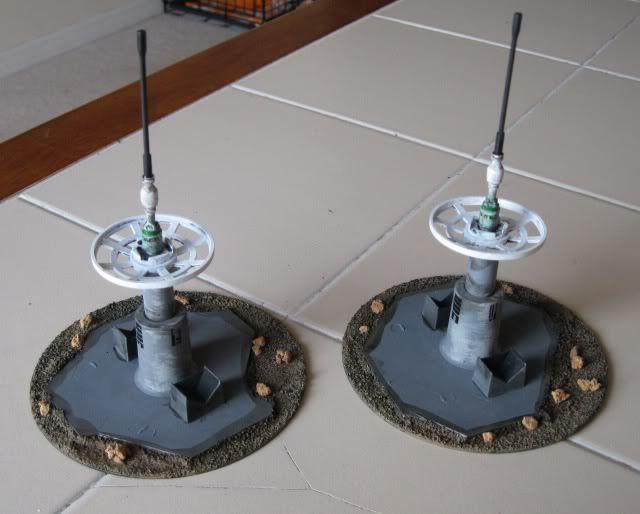
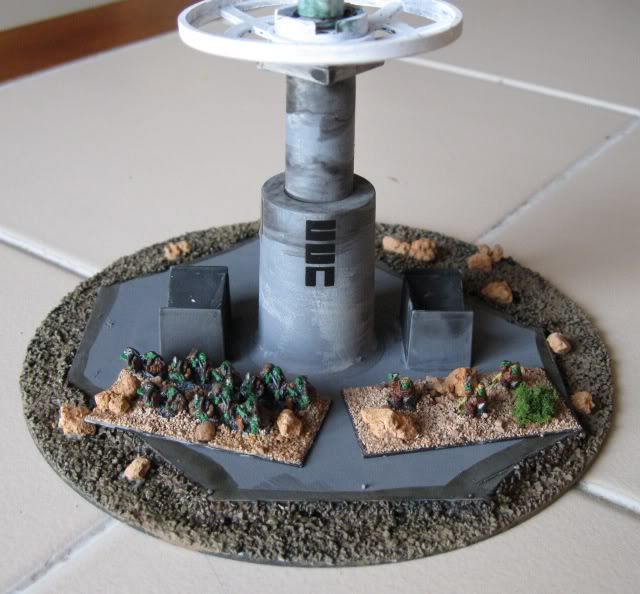
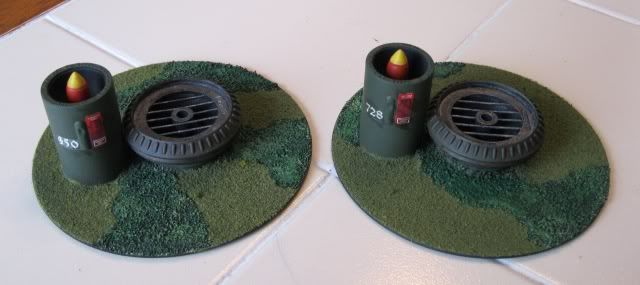
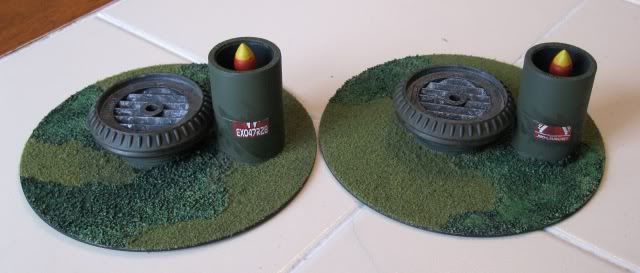
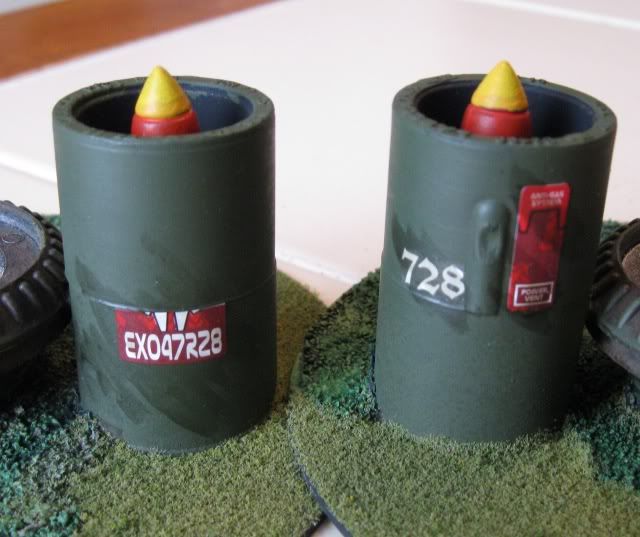
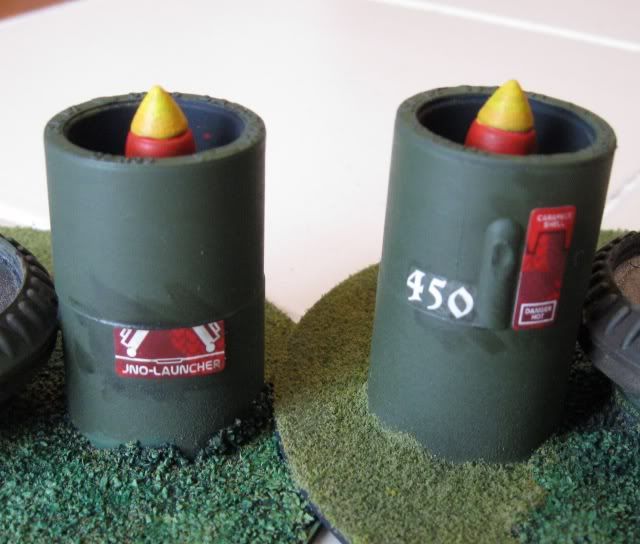
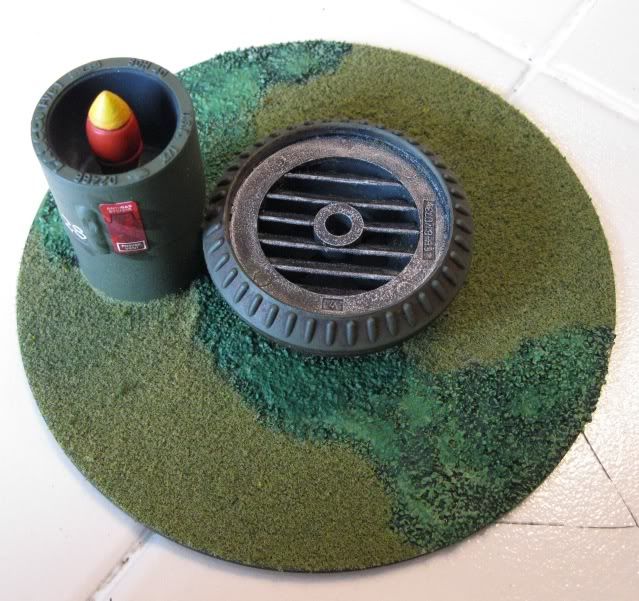
Fresh off the factory floor, post sealant spray, is one of the sat-comm towers. This made for a very nice piece of 'flavor text' terrain on the hex map. Although there aren't any hexes on the base of it, it should be easy enough to approximate. It could make for an actual objective, or just some sci-fi goodness hanging out in the background.

So there you have it, Gut Check! of sorts, if nothing else think of this as a preview of things to come. Check out his site, download the rules, and I'm sure if you had any feedback, that'd be appreciated as well! But the 15mm gaming isn't done!

Another ruleset that I've got my eye on is Gruntz, which also seems made just for what I'm looking for. Here's the Gruntz blurb:
Grunts is a dedicated 15mm fast play wargame designed for skirmish level play with between 10 to 40 figures per side using combined arms. You can use miniatures from any 15mm SCI-FI manufacturer. It is based around a generic platoon level battle, not restricted to a set genre or background setting. Vehicle and artillery rules are included for a combined arms gaming experience with statistics provided for all manufacturers of 15mm sci-fi and modern figures.
Gruntz and Gut Check! aside I've also purchased the highly recommended Future War Commander rulebook, so my 15mm sci-fi gaming options are wide open, and I'm open to any other suggestions you may have!

Friday, January 14, 2011

A Pair of Sat-Comm Towers


With the completion of these two satellite communication towers I have now constructed as much terrain in the first two weeks of the new year than I did in all of last year! All of it! Again using cd's as my "small terrain base" standard I made these two pieces. This time I used even more junk and more spare parts.

The parts that form the basis of the towers themselves, the largest pieces, are actually plastic spindles that hold the ends of large rolls of paper inside their cardboard boxes. Each end plugs into the paper roll and they had large square bases, which I subsequently had to hack off a bit so they would fit the diameter of the cd base. The gravel and rocks are just that, just some of my basing dirt. For the radar dishes I used Lego parts, a couple of leftovers. The dishes are from Lego sets and sell for three cents a pop, there is a lightsaber handle in there, and on the underside of the dish is a flax 1x2 tile to keep it level. The antennae themselves, and well as the other cylinder piece are actually from a knock-off company. I super-glued all of this together when I was done, and there you have it, sat-comm towers!


I made this originally with the intention of 15mm sci-fi gaming, so the first size shot is with some of my GZG troopers. As you can see, there's enough room for a sniper fig or what-not to stand on the dish itself. I used leftover Tau transfers, but tried to use the kind that didn't scream "Tau" and said "techno mumbo jumbo" instead.

Here's a view with some 28mm troopers...

By request, here's some 6mm stands...not a bad size scale!


I might've shown these guys before, but while I had out my box of 15mm troopers out, I thought I'd show it again. These aren't all of my 15mm troopers, but a single army I had painted up for Star Grunt II (now free!) a while back. It consists entirely of GZG figs, broken down into three platoons of regular troops, a platoon of power armor, and an HQ squad. Hopefully they'll be storming the sat-comm towers sooner than later!

Tuesday, January 11, 2011

A Pair of Missile Silos


Here's a pair of missile silo terrain pieces I whipped up, half of my opening salvo of terrain goals for 2011. See how I did that? Salvos, missiles...clever stuff. These were easy to build, and I just used spare parts lying around, nothing fancy.

For the bases I used old cd's, I'm beginning to like using cd's as a small terrain piece standard. The silos themselves were just PVC pipes that I glued down with Gorilla Glue. The missiles inside of them were from an old GI Joe vehicle, these were glued directly to the cd as well. The last part, the large exhaust vents in the center, were parts of an old vacuum cleaner (I think). They screwed in as part of a filtration system of something.


For the decals I kept it simple and used some numbers off of a Cadian Imperial Guard transfer sheet. I was a little stuck as to what else to put on there, it looked a bit plain. Poking around my decals/transfers bag I found it; Lego stickers.

Lego switched to using stickers instead of printed bricks some time ago, which was a real let down. For that reason I stopped using the stickers. These red stickers are from their Exo-Force line and worked out pretty well. They are just stickers though, so I may need to paint some white glue on them so they won't peel off.


Here's a top-down view of one of the silos...


What's terrain without the figs to use it? I made these silos with 15mm gaming in mind, sci-fi of course, but that WWII armored car up there does look kinda cool next to it. I also stuck some 28mm guys on there too, just to see, and although the scale of the missile goes from ICBM strength to surface-to-air strength, it still looks all right.