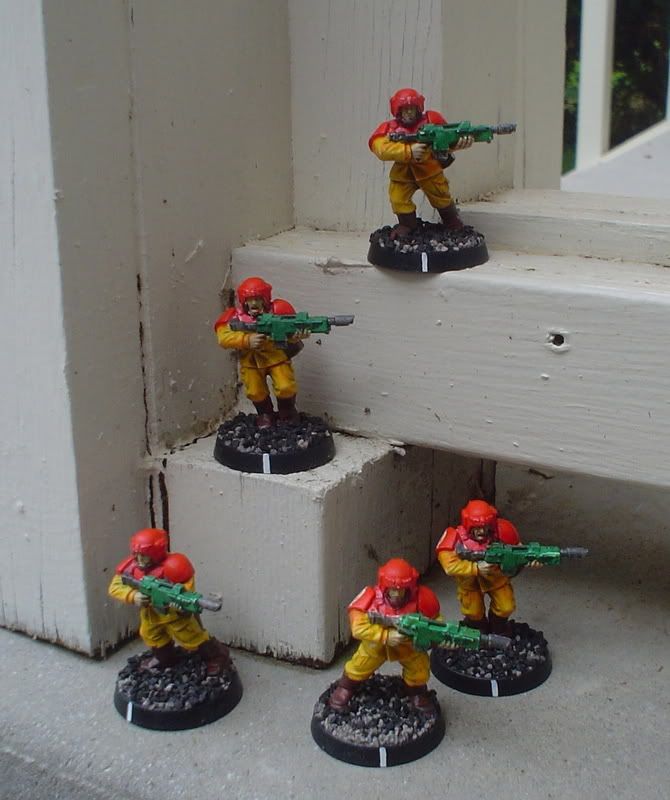
I've been on a painting roll lately, for me anyway. Here's another squad of generic sci-fi grunts for use with just about anything you could throw at them. Specifically, like the last batch, I painted these guys up for the 5150 rules expansion, Under a Hishen Sky. I haven't played the scenario yet, so they may just be a cameo appearance, if at all. I've given the scenario a cursory looking over, and it seems pretty fun.
Basically, you play a group of blue collar friends on a three day vacation to a local swimming/fishing hole, doing some camping and hanging out. Well, those pesky Hishen slavers (I've mentioned them before, yeah?) show up to do some abducting. If you meet conditions of the scenario (get to your hover car and hammer on the comm-set) you can call in reinforcements from the local mine where everyone works at. Well, the figs I painted up represent the security team that shows up to assist.
It's a backwater world and a blue collar job, you're not getting top-notch spec-ops troops. They work security, at a mine. I envisioned rookie fresh troops who get their kicks by handing out citations to mine workers for parking violations, on the weekends they like to take their recycled plastic lasguns out to the "range". The range, of course, being someone's backyard.
 I thought of the mine (don't know what they mine exactly) and thought of it kind of like modern day aircraft carriers; all the laborers wear color coded outfits. Security got stuck with yellow, I picked it just 'cause it'd be crazy bright and definitely different than what I usually paint. I imagined their lasguns being very cheap, recycled, and fresh out of the shrink wrapped plastic crate, they're like Glock rifles of the future; they work reliably, but are mostly polymer and won't win any beauty pageants. The same applies for their carapace armor; helmets, shoulder pads, and torso armor is all lightweight recycled plastic.
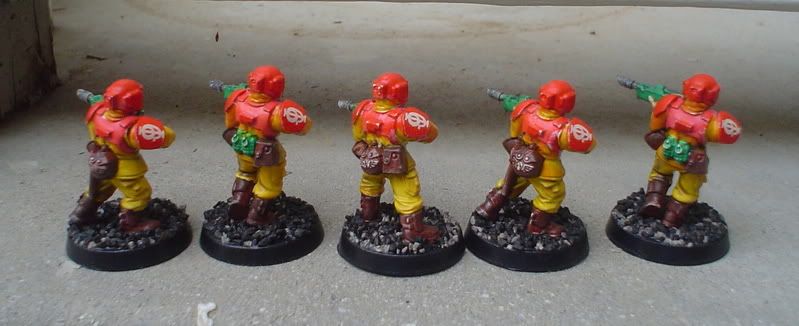
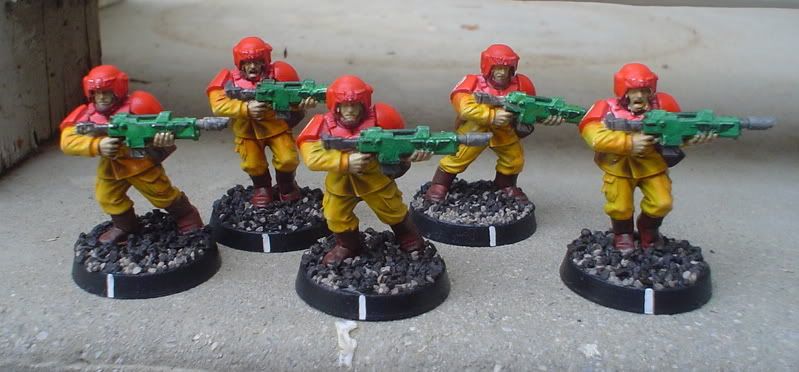
You might think I've done some fancy, white drybrushing on their packs, armor, and grenades. No, they were still sticky from the dip, and being impatient I handled them anyway. The white areas are where my fingers took off some of the paint, revealing the white undercoat, haha. The numbers are leftover Dark Angel decals, not freehand.
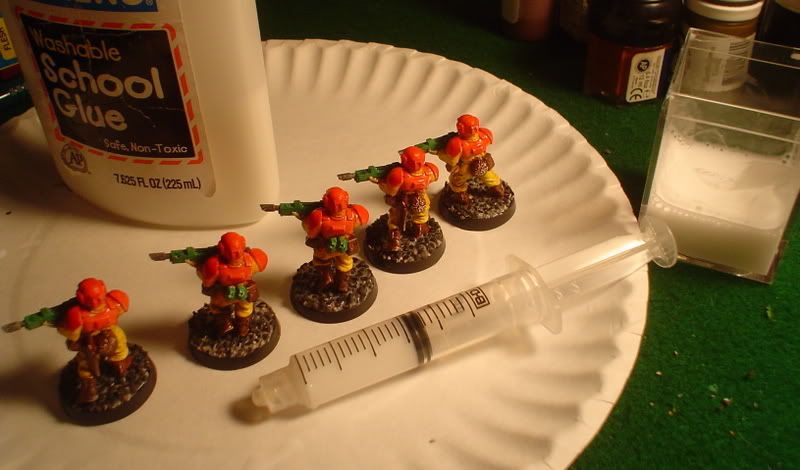
Here's how I apply basing on all of my models. I use white PVA glue and pour it directly onto the base of the model. Then, using an older brush, I "paint" it around the base, making sure not to get it on the feet of the model. If any glue gets on the side of the base (if using plastic slottabases) I just wipe it off with my finger. Then I dunk the base in whatever ballast, or dirt/gravel I'm gonna use and 'swish' it around some. After that, I use a 50/50 mix of glue and water, put it in an empty syringe, and then just apply about three to four drops to the base. It spreads out and soaks in, when it dries it is rock solid. It's quick and easy, cuts out about four extra steps, and does wonderfully.

I went bright and bold with these guys, a stark contrast to the last batch.
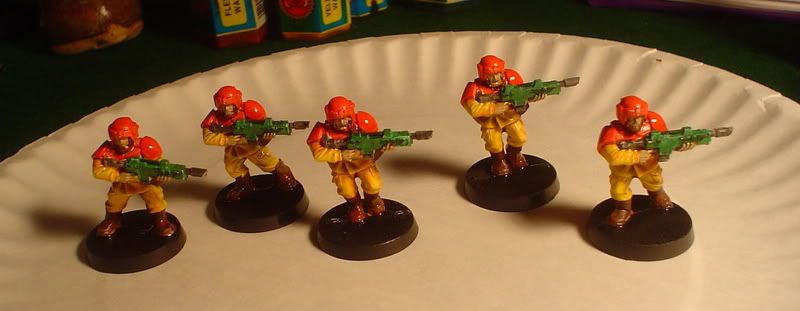
Squad, nice and shiny right after their dip!
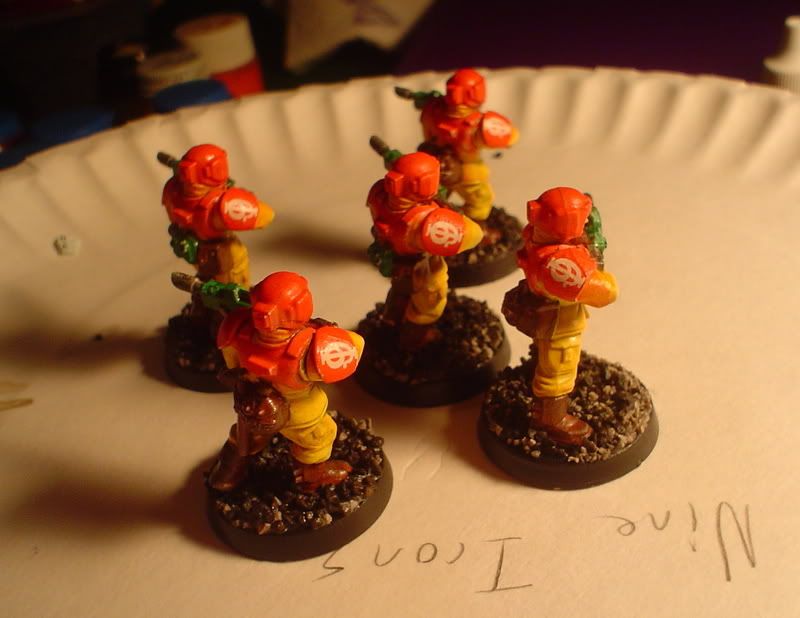
I jotted down their name while painting, it just comes to you sometimes. I was going to do orange armor and guns originally, but changed my mind (see below). Anyway, I got up about halfway through painting (I was also watching an excellent Monday night game) and when I came back a few minutes later I then realized they had the exact same color scheme as Iron Man, haha. It takes a fresh perspective sometimes. Since I use my GW decals all the time, and put 'nines' on their shoulders, I thought "Nine Irons" would be fitting. Sunds like a good security team name anyway, and has a little inside joke to boot.

Comparison of dipped (right) and pre-dipped.

The thing, the big thing that makes these figs different than most I've done is that I didn't paint them, per se. I used washes, almost exclusively. I didn't thin my paint and do the Valis technique or whatever, (I would link the Valis technique, but keep getting Philip Dick novels) I just used washes over the whole model, broad spaces, faces, details, whatever was called for. It was frustrating, and a pain at times, and incredibly sloppy. But, I had the entire squad painted before halftime of the aforementioned Saints / Vikings game. I spent the second half of the game tidying up some of the more messy areas with a brush, applying decals, dipping, basing, etc.
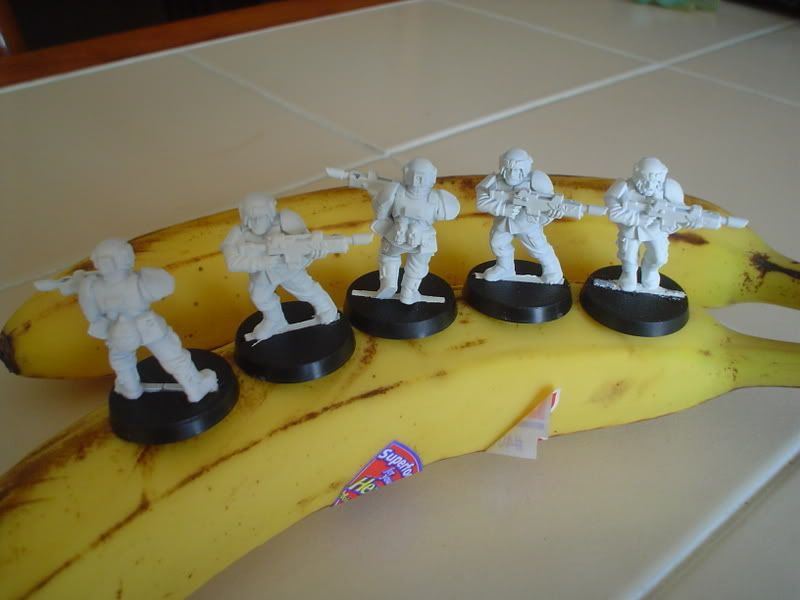
Assembled and primed atop a piece of Guatemalan fruit.
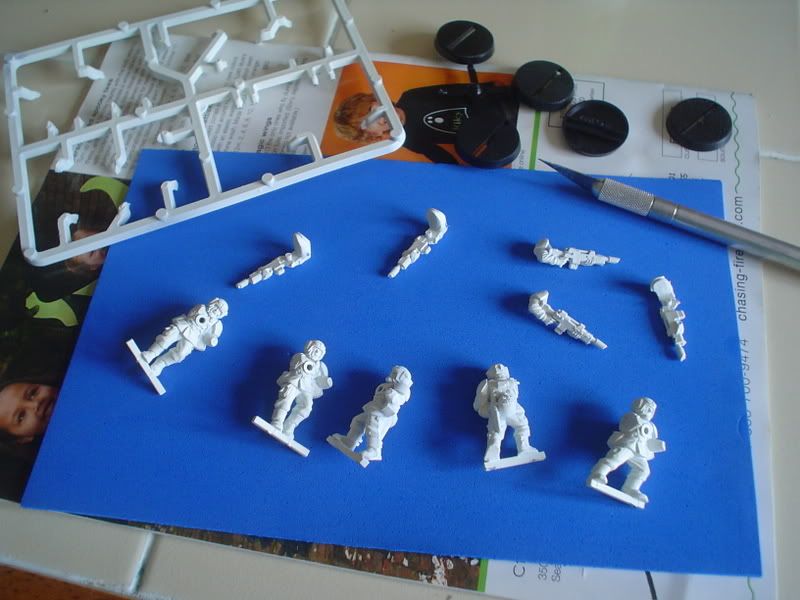
I undercoated them white, still on the sprue and just clipped 'em off.
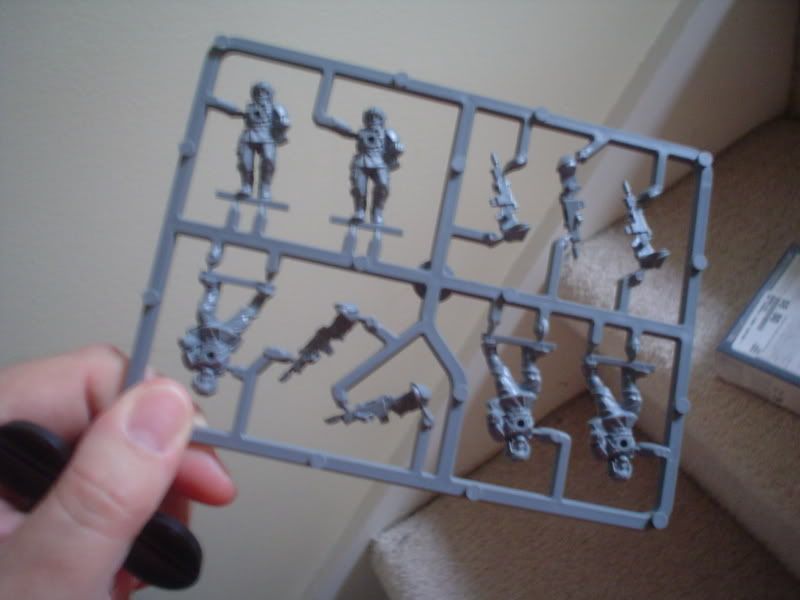
These are some very simple models. Although they look just like the awesome multi-piece Cadian plastics, they are far from it. They would make for great filler troops if needed, or in this case, just good for some quick and easy human troopers.
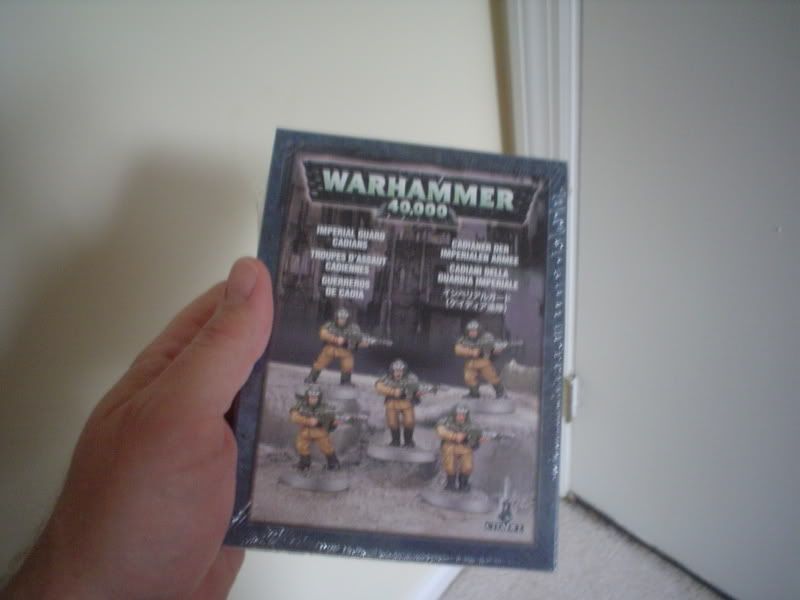
$8 bucks for five troops. Sweet.
Never saw a step by step painting guide done completely backwards before. ;-)
ReplyDeleteBy the way, excellent idea with the syringe and the 2nd pass of glue!! Dang, all these years I've been dipping a brush in and waiting for it to pool off the end, two or three times per base...
Ha! Look around, all of my painting guides are in reverse!
ReplyDeleteI feel some bragging rights coming on that *I* passed along a miniatures tip to *you*...
That is a good idea about using the syringe! Good to see some primary-coloured Guard, too!
ReplyDelete- Drax.