Showing posts with label Cooking. Show all posts

Tuesday, January 17, 2012

Tres Dippos Facil


Three easy dips! Lots of football on right now with the playoffs in full swing and all. So with all of that football comes lots of excuses to have lots of people over to watch said games, and lots of excuses to eat horribly unhealthy food. Mind you, you don't have to like sports to have an excuse to whip up some quick and easy dips however. Maybe it's a Stargate marathon, or just game night around the table. Whatever the case, try one of these next time.

Cheesy Chorizo Dip
Ingredients:
  • Chorizo (Mexican sausage)
  • a box of Mexican style Velveeta cheese
  • a can of Rotel (hot)
Directions:
  • cut up the Velveeta into one inch cubes, either half the box for a small amount, the whole box for a huge amount
  • fry up the Chorizo, two sausages for half a box (above) or four for the full box, drain
  • put the Chorizo and the can of Rotel into a crock pot with the cubed Velveeta, a sauce pan on the stove will work if you don't have a crock pot
  • cook it for a few hours in the crock pot, mixing occasionally, and you're good to go, if you're using the saucepan, just don't leave it unnattended
That's it, and you're good to go. Even the prep time, if you can call it that, is minimal. This one is tasty, and one of my favorites. If you don't like spicy stuff, switch the Rotel to regular. Good with tortilla chips, corn chips, and the like.


Bean Ole Dip
Ingredients:
  • one can of refried beans
  • one small onion
  • a block of cheese
Directions:
  • dice the onion
  • shred the cheese
  • put everything in a pot and cook it
Yeah, it's that easy. This one is neat because it can change quite a bit just depending on the cheese you put in it. Cheddar, Monterrey Jack, even Swiss, it's all good and every time makes for a different dip. If you're not a big onion fan, maybe try half of a diced one, me, I put in the whole thing. This one is good with tortilla chips and the like, but you can also dip flour tortillas in it, or even spread as a burrito filling.


Hidden Valley Dip Dip
Ingredients:
  • one packet dip mix
  • one 16oz container of sour cream
Directions:
  • put them in a bowl and mix together
I saved the easiest, and most non-original, for last! This one is a delicious no-brainer, costs next to nothing, and is stupidly easy to fix. If you can chill it for a couple of hours beforehand, even better. All of these reasons make it a perfect game table dip too, heck, you can even make it at the game table! Good with pretty much anything you can buy in the chips section of the store, not to mention veggies like carrots, cauliflower, and broccoli.

Saturday, October 15, 2011

Bunker Buster Burgers


Maybe I should change the name to belt busting burgers! These are not for the health-conscience, nor the feint of heart (literally), but they are delicious and as I tell my daughter, they make a great "sometimes" food. Like last time, I'll try to make this recipe easy to follow and even easier to execute.

Bunker Buster Burgers:
  1. You're making burgers, so get some ground beef, ground chuck, or what have you. Don't go too lean, a little fat content in there goes a long way in the flavor department.
  2. You're going to want some good Mozzarella cheese, the thick-sliced stuff like you get at the deli counter.
  3. For veggies I went with onion, jalapeño peppers, and tomatoes. This can vary according to your own tastes.
  4. An odd ingredient you don't normally see would be sliced pepperoni, a small package of these goes a long way.
  5. Finally, gourmet burgers like this don't get slapped on a bun, while you're in the bakery/deli area getting your cheese, get some Ciabatta rolls too.
Let's get it all together:
  1. Make your burger patties, I took a pound of ground beef and split it into thirds. For making patties I use an egg and a little Worcester sauce and just patty them up by hand.
  2. Dice up the selected veggies you've picked out. How much? See below.
  3. Also dice up the pepperoni, for quantity just make it equal parts with each veggies type. This will form a topping for each burger, so just eyeball it.
  4. If your rolls aren't slice, do that now as well.
  5. I'm assuming you've got ice somewhere, just make sure you've got half a glass full on hand for the cooking.
Let's cook 'em up:
  1. First things first, sauté the diced veggies and pepperoni in olive oil. Set aside.
  2. Warm up the oven to 350ºF degrees, you'll toast the rolls in here.
  3. Get a large skillet with lid, big enough to cook all of your burgers at once and start pan frying them. This is no exact science, but I like to cook the first side a little longer (4-5 minutes) than the other side (2 minutes).
  4. After the two minutes on the back side is done spoon on generous helpings of the saute´mixture on top of each burger, the more the merrier.
  5. Next, cover the mixture with one thick slice or two thin slices of Mozzarella.
  6. Immediately drop in a handful of ice into the frying pan and quickly cover with the lid. Caution: You've got hot grease that spatters with water, add these ice cubes carefully and cover quickly.
  7. The ice in the covered pan creates a lot of steam, this trick will melt that thick cheese while locking in all the juiciness and flavor.
  8. While everything is melting, toast the rolls in the oven.
  9. After a minute or so, the rolls and the burgers should both be ready, serve and enjoy!
Even though a 'sometimes' food, I've cooked these up twice for company, and yeah they're a bit messy but they get very positive reviews. I usually cook burgers on a grill, so the pan frying is a big change up, but for this style burger I don't see it any other way. I try to connect these recipes to gaming, really I do, but I can't see how here. They're a bit too involved to whip out for game night, and they're not exactly appetizers or finger food. The clever title will have to be their only saving grace. Hey, it's no coincidence I posted this on a Saturday, and you probably have most of these ingredients already on hand, what are you waiting for?

Saturday, September 17, 2011

Stuffed Veggie Flautas


Here's a very quick, and very tasty dish I whipped up last week. I've gone easy on the ingredients and steps below because I was improvising along the way as it is, and you should too. Here you go, Mik's Stuffed Veggie Flautas, enjoy:

Stuffed Veggie Flautas:
  1. Make some mashed potatoes, I like to add shredded pepper jack cheese, sour cream, and/or cream cheese. For this batch I used all three, set aside for later.
  2. Get your favorite peppers and veggies from your garden (or the store). For this batch I used all my own garden goods; jalapeño, poblano, green peppers, and some hot banana peppers.
  3. Cut these into thin strips and sauté with a little olive oil and some fresh garlic, set aside for later.
  4. Get a couple of avocados (if you like them, but who doesn't?) and slice up into strips.
  5. Get some oil warming up in a large skillet, I used six cups (which is a lot) of canola oil.
Now you're going to put it all together:
  1. Get some small flour tortillas, six or eight inch diameter.
  2. Get your assembly line ready with all of the above fixins.
  3. Take a tortilla and spread a not-too thick, not-too thin layer of the mashed potatoes as a base.
  4. Next take some strips of the sauteed veggies and lay them in a line in the middle of the tortilla.
  5. Finally lay in a slice or two of the avocado.
Now it's time to cook them:
  1. Fold in the edges of the tortilla fist and foremost.
  2. Next, roll your tortilla tightly, like a fine cigar, the tighter the better.
  3. Keep it held together with toothpicks.
  4. Lay them in the heated canola oil, you're frying them, they'll cook fast so keep an eye on them, maybe a minute or two per side.
That's it, they're not the healthiest since they're fired, but you could fool yourself and say the veggies are in fact healthy. Serve up like mine in the photo at the top of this post and if you want to be really cool, slice them in the middle with a diagonal cut like the restaurants do. I garnished mine with some cheese, more avocados (because I can't get enough), and enchilada sauce. Cook these up for your next gaming session and impress your buddies. The smaller the tortillas the bigger batch they will make, which is more finger food for you and your friends.

Wednesday, September 16, 2009

Grape Jelly Meatballs


Mik's Minis Grape Jelly Meatballs
Ingredients:
x1 bag frozen Italian meatballs
x1 jar grape jelly
x1 bottle barbecue sauce

Method:
1. Put meatballs, grape jelly, and barbecue sauce in a large crock pot, in that order.

2. Cook on high for two hours.

3. Stir crock pot gently with wooden spoon, set to low. Serve hot.

It doesn't get any easier than this one folks! It sounds weird, I know, grape jelly and meatballs? Trust me on this one, I wouldn't lead you astray would I? It's not the healthiest, but does serve as a great, hot appetizer that goes a long way around the game table. Not as finger-food friendly as, say, Spicy Balls of Doom, but put a spoonful in a bowl with a fork, or serve the crock pot in the center table and dish out toothpicks, and you've got a crowd pleaser. It's good for both long RPG sessions, and football double-headers! When it comes to the jelly, I go with the cheapest stuff I can find in the store, but conversely, in regards to the barbecue sauce, I tend to go for the better brands. I mix it up from batch to batch too, sometimes I go with a honey-spicy sweet kind, sometimes I go with something a little more bold and spicy.

Thursday, September 10, 2009

Spicy Balls of Doom!


Simple, simple, simple...

I've been doing quite a bit of cooking lately. Not the usual "cook dinner" kinda thing we all do, but delving into techniques, ingredients, and trying new stuff. I'll save you most of these, wanting to keep the recipes I post on here somewhat gaming related.

Now these 'Spicy Balls' aren't anything innovated, we've all had them before, mostly at Holiday parties, and mostly cooked by friends and relatives. They're not exactly "spicy" per se, but it sounded better than naming them "Mik's Spicy Balls". Oh my.

These are, bar none, the perfect finger food to put at the gaming table! There's zero mess, they're incredibly addictive, and provide more sustenance than chips. There's also about six thousand recipes online for these, so I have painstakingly sifted through them all, tinkered with the amounts, and came up with your best bet. I have done this for you. My readers. Trust me, there are many recipes for this tasty snack that will lead you astray.


Mik's Minis Spicy Balls of Doom

Ingredients:
x2 jalapeños, seeded and finely chopped
x1 pound breakfast sausage
x2 cups sharp cheddar cheese, shredded
x1.5 cups Bisquick

Method:
1. Mix it all up. Over and over and over until you go from "Dude, this is never going to mix up!", to the moment you go, "Aha, finally, it got mixed up!". If you let the sausage get warmed up to room temperature beforehand, this will be a lot easier.

2. Preheat your over to 375° degrees and make sure the rack is in the center.

3. Take a pinch of your mixture and roll into bite-size balls, maybe half the size of a ping-pong ball, depending on your preference. A good size to shoot for is one that would take one to two regular bites, or a mouthful of a single bite. Balls can be frozen prior to cooking.

4. Layer a cookie sheet with aluminum foil and place the balls on it. You can layer them fairly close to one another to save room. Cook for 20 minutes, or until golden brown.

5. Remove from oven, place on paper towels, serve hot by themselves, or with a variety of dipping sauces such as a honey-mustard, or a spicy dijon.

6. Never, ever, EVER use chorizo in place of breakfast sausage!


The above recipe yields about two of these containers, which is plenty for up to about five adults, especially if there's other snacks present. It's an easy recipe to crank out, requires very little prep work, ingredients on hand, or time. Double it if you want a lot more on hand, and don't be surprised if there's still nothing left by the end of the night. These travel very well and are easy to pack, so do your DM a favor next time and bring some!

Friday, August 21, 2009

Fires of Mount Doom Salsa


the garden continues to bear fruit...

So I've made this salsa the last couple of game nights now and thought I'd share the recipe here. My favorite thing about this tasty condiment is that it comes entirely out of my backyard, save for a single onion. I also warn ya, it is a hot salsa, very spicy (hence the name). It's not atomic, but if you're not fan of heat, it may not be for you. I made the recipe so it escalates up in the ingredient count, alter as you like to make it less (or more) spicy. The larger the tomatoes, the less spicy it will be. Same thing goes for the onion.

Mik's Minis Fires of Mount Doom Salsa
Ingredients:
x1 small to medium white onion
x2 medium to large tomatoes
x3 habañero peppers
x4 jalapeño pepper
x5 cayenne peppers

x1 tablespoon of olive oil
x2 pinches of coarse salt
x3 pinches of ground pepper
x4 pinches of cilantro

Method:
1. Dice the tomatoes and onions into pieces and put into medium bowl. Dice habañero and cayenne peppers very fine and put into bowl. Slice and quarter the jalapeños and also put into bowl.

2. Add remaining ingredients to the bowl. With a wooden spoon, mix ingredients thoroughly. Immediately drain the juice at the bottom of the bowl. This will be the only time you do this part, don't worry, more juice will accumulate later.

3. Cover and refrigerate at least one hour prior to serving (the longer the better however, even overnight). Once uncovered, remix the ingredients then serve.

EDIT: My buddy Andy made a pretty funny comment forver linking the name of this salsa with the blazing Eye of Sauron and the next morning...

Sunday, July 26, 2009

Chupacabra Burgers


Now...that's a burger!

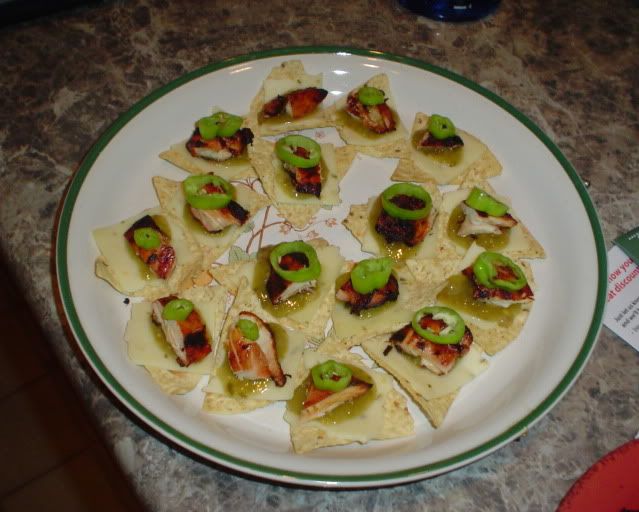
Let's talk burgers today, big, tasty burgers. It's not just the burger itself, it's what you put on it...and in it. Here's an easy burger recipe that you don't have to be a culinary school graduate to pull off, and unlike my 
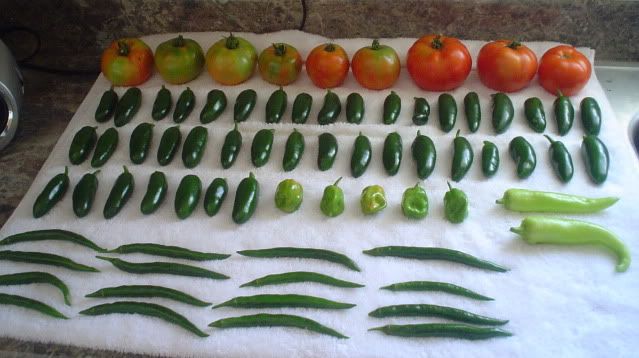
chicken nachos recipe, I will not require your veggies off the ingredients list to come from your own garden, like mine did!


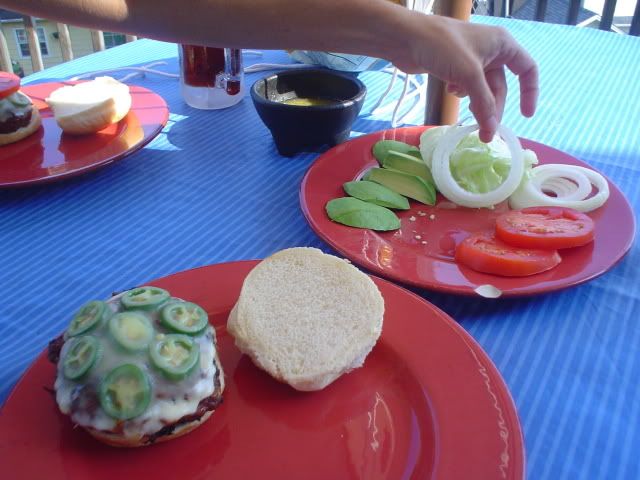
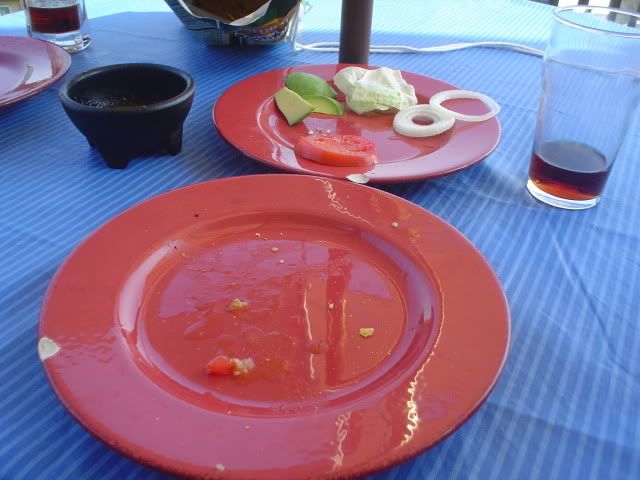
...and my wife's plate

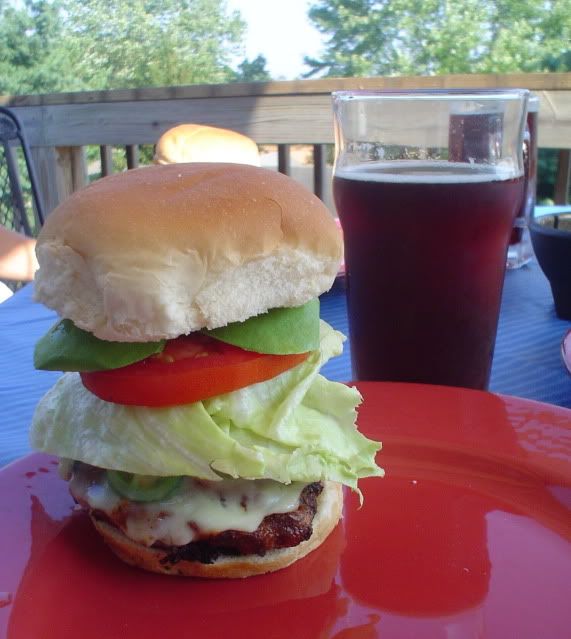
You'll note in both pics a tasty beverage which accompanies and compliments the taste of these burgers beautifully. From its rich, amber hue it could only be Newcastle Brown Ale.
Newcastle Brown Ale pours a crystal clear brown-amber that produces a transient tan head. As is expected, the aromas that rise from the glass are a mixture of subtle nuttiness and sublime biscuit and toasted caramel. As is common with brown ales, hop aroma is nearly non-existent. Upon drinking, a gentle wash coats the palate pleasingly without the sting of carbonation bite. Faint almond and cashew flavors intertwine with notes of sweet malt and caramel. The carbonation level of Newcastle’s offering is low, leading to a smooth finish and easy drinkability. Subsequent bitterness provided by the earthy English hops is balanced perfectly with the overall malty character. For a “simple” style, there is definite complexity of character in this beer. -The Bachelor Guy

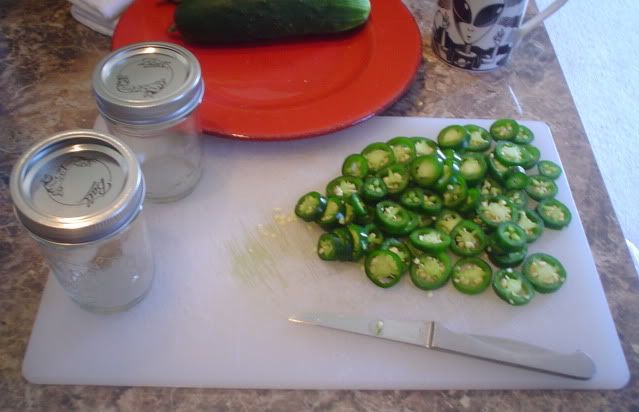
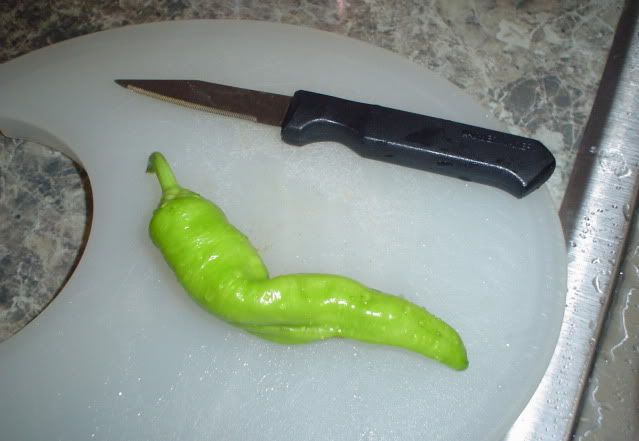
You'll need to dress 'em with veggie goodness

Mik's Minis Chupacabra Burgers
Ingredients:
x3 jalapeños
x1 pound ground beef 80/20
x3 hamburger buns
x1 tomato
x1 avocado
x1 packet taco seasoning
x1 onion
x1 egg
x1/3 head lettuce
x3 pieces sliced goat cheese (specialty cheese counter)
x1/3 block sharp cheddar, shredded
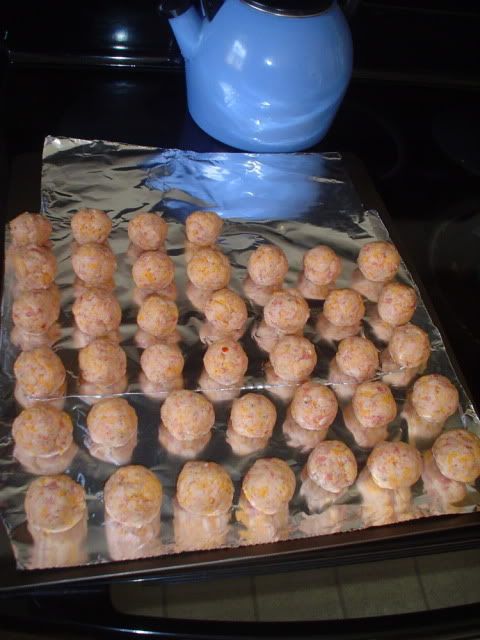
Method:
1. Thoroughly combine ground beef, egg, taco seasoning, and shredded cheese in a medium bowl. You're going for big burgers, so don't skimp on the patties. Weigh out three equal sized portions and form into patties. A tip here is to keep the outer edges of your patty thicker than the center. Place on plate and put into refrigerator.

2. Turn on grill (I use a gas grill) or warm up coals, etc. and leave lid open to preheat.

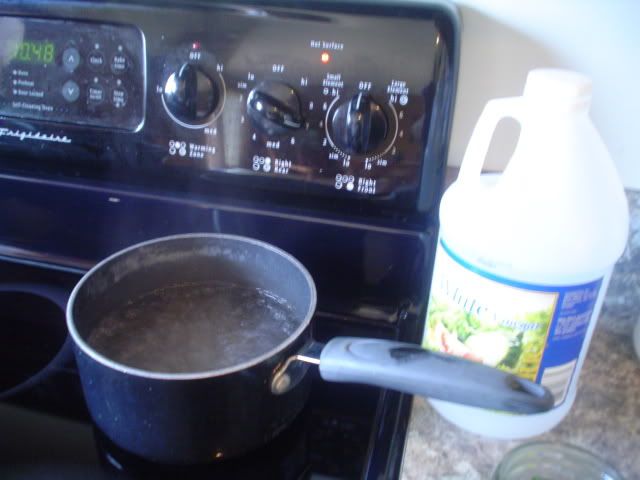
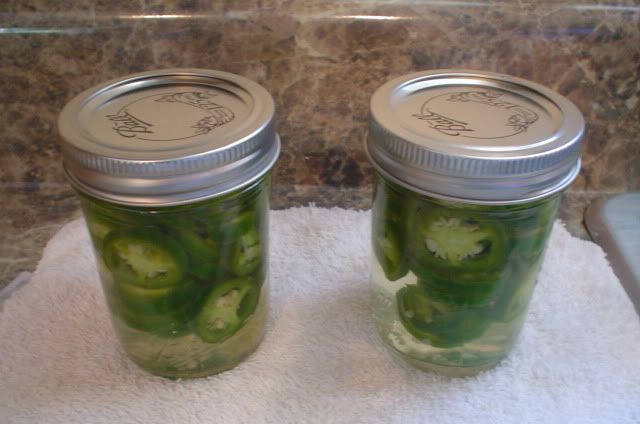
3. While grill is preheating and burgers are chilling, slice your onion, tomato, and lettuce. Also skin and cut the avocado into pieces and slice the jalapeños.


Now you're ready to grill!

4. Before placing your patties on the grill, spray the grates with a nonstick cooking spray. I like a good, indirect heat when I grill. Turn the burners where the burgers are to a medium low, and the empty front burners on high.

5. The biggest mistake you can do with your burgers is to flip them over and over again. Flip them just once or twice at the most...and don't press down on the patties with your spatula! You're just squeezing out all the flavor!


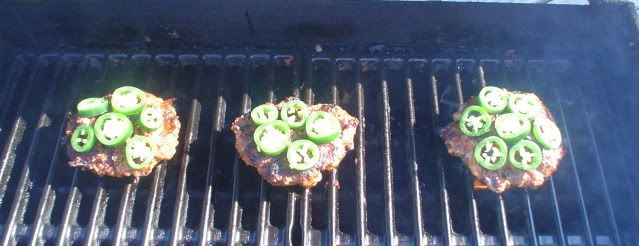
Can't you almost smell them?

6. When your patties are done being flipped, place a wide layer of the sliced jalapeños on the burger. Don't stack them, just a wide, even layer.

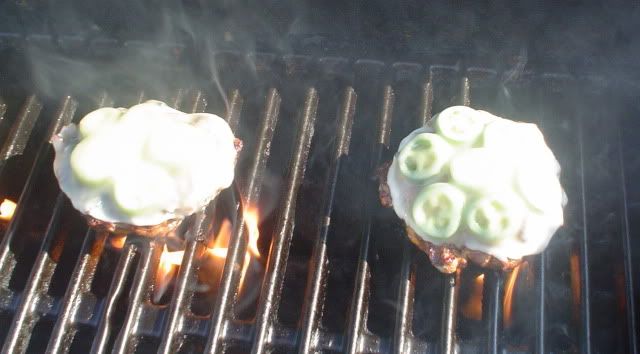
7. Carefully place your thin slice goat cheese over the jalapeños and burgers, turn the burners under the patties to low, and close the lid of the grill. This stuff melts quick, count to maybe twenty in your head, then open the grill up. You should have a nice 'ghost' effect as in the above pic, your burgers are ready, get ready to eat.

8. Stack those veggies on high! Whatever you like, but the more the better. Unless you absolutely can't stand one of the ones listed, put it on, even if you don't like [veggie x] by itself, you might be surprised when its taste mingles with the others.


Here at Mik's Minis we make 'happy plates' (and glasses)

This meal is all about the burger, stick to that and you'll go far. You'll notice there's no side dishes here either...you don't need them. Our culture has told us every meal needs appetizers, desert, side items, etc. When you've got big, juicy burgers like these, you don't need that other stuff. Truth be told we did munch on some yellow corn chips and green salsa while I was prepping everything, but that was about it.

I made three patties, we ate two, and the third one made a great lunch the next day right out of the fridge. You may be tired of hearing about my garden and veggies, heh, but it was neat to pull my own tomatoes off the vine and slice jalapeños I also grew in the backyard. I'd love to hear from anyone who gives these a try! Enjoy!

Saturday, July 25, 2009

Canning Jalapeños Tutorial


Yeah, yeah, this is a "gaming" blog and here's another dang gardening post! Get used to it, 'cause I think here at Mik's Minis, we're going to be renaming the place "Mik's Veggies" in the summer. So my little experiment of a garden is going well, very well. In fact, I've got so much produce yield, I have to start getting creative with the excess. I've given away about all I can, so now I'm adding pickling and canning to my repertoire.


These two mason jars were filled up with sliced peppers from just a single visit to the garden one afternoon. Just that morning I had given away fourteen peppers to some friends and family, now I had another two jars worth, so I turned to canning. These jars aren't very big, I bought standard Masons with the idea of smaller portions in mind.

Canning is a cool process and if I can do it, anyone can, it's incredibly easy. Plus, with very little prep, you can keep food (fairly natural) for up to a year or so. For all the budding zombpocalypse survivalists and end-of-the-worlders out there, this could be just one more tool in your preparation. There's also something cool about canning your own stuff. We (used to) buy jars of jalapeños at the store all the time, no longer.


First off, wash your jars, lids, and bands inside and out with lots of hot, soapy water. I then used boiling water to rinse them with. I had a bad experience years ago with a batch of home brew beer that ended up with worms in it because we (Oz and I) didn't properly sanitize our kit. It might be overkill here, but I didn't want a repeat.


So, you've got your jars and lids sanitized. Next is your high tech canning solution, white vinegar and water. That's it. Your mix should be one to one (1:1), and here I used two cups of each. Then you boil it up, as shown above. All you're going to do here is place your jalapeños, sliced, in the jars and scoop out the boiling mixture and pour it in the jars right away. The jars I kept in a large pot in the sink with hot water prior to this step. This way when you pour in the boiling water, your jars don't shatter on you, even thought they still might.


Just me talking through the lid process.


All right, that's all there is to it! Here's two jars, good to go, they're in the cabinet, labeled, as we speak. I've got plans for these puppies this fall come football season, I may just eat them right from the jar. I was out watering this evening and noticed a good haul hanging on the branches right now, so I'll be doing up another batch of two (or three) jars sometime tomorrow.

Saturday, June 6, 2009

The Fruits of my Labor


Remember this little guy?

Not only is this one pepper ready to come off, check out that new one coming along behind it. It's even bigger than the one I posted on originally. This one plant is bearing fruit already, way ahead of schedule, and I counted at least half a dozen little 'pods' (flowers) on it today as I "harvested my crop". I should do a follow up on the garden in general, everything has taken off, we've had a lot of heat and a lot of rain lately, and those two factors combined with daily pruning have made for some great looking plants.


Washed and prepped for surgery, the ultimate organ donation

I admire many of the singular blogs out there that stick to just one thing, usually it's 40k or something else. I really admire those that not only stick to one thing, but narrow it down on top of that and just do one army, or terrain, or the like. For me, I obviously can't do that, haha. What the heck does gardening have to do with gaming? Well, we've already covered this, it's got everything, then again, nothing to do with gaming.


A single pepper yields more than it looks


Mik's Minis Green Chili Nachos

Just how many GAMING blogs post recipes, aye? I know what you're saying, "If you're posting a recipe, you're not exactly a gaming blog now are you?" To that end, I say a resounding "Bah!" So, here's a first for me, Green Chili Nachos, Mik's Minis style:

Mik's Minis Green Chili Nachos
Ingredients:
corn tortilla chips
green salsa
one large chicken breast
spicy chipotle marinade
sliced pepper jack cheese
banana pepper (that you grew in your own freaking backyard)

Method:
1. Marinate the chicken for at least one hour. Preheat outdoor grill to high and use cooking spray over grates prior to placing chicken on grill. Cook until chicken is done throughout, trying to turn each piece a minimal amount of time. Once finished, take the chicken off of the grill, put the pieces on a plate, and set aside.

2. Arrange whole tortilla chips on a platter, picking the ones that are most flat. Fold each slice of pepper jack cheese into quarters, making four separate pieces, arrange one piece per chip. Next place half of a teaspoon of green salsa on each chip (on top of the pepper jack). Dice the banana pepper...that you grew in your own freaking backyard into rings and set aside on a separate plate, do not put them on the nachos yet.

3. Your chicken should have cooled down by this point, enough to cut it into cubes or small strips, do so, and then place one piece of cut chicken on the bed of green salsa on each chip. Next, garnish each piece of chicken with a ring of banana pepper that you grew in your own freaking backyard. Serve with a cold beverage and enjoy.